
How to Edit Drone Photos

After shooting with DJI’s Mavic 2 Zoom since September of 2018, I’ve noticed a few things. The Dynamic Range can be difficult to work with and it doesn’t perform well in low-light. Shadows are often muddied and the images never appear as sharp as I’d like them to in-camera. This of course becomes painfully obvious while editing.
Luckily, you can adjust and compensate using Lightroom and Photoshop. I’ve outlined an editing workflow introduced to me by my good friend James Sullivan (@Cultural_Ambassador) for DJI drones below. NOTE: this is not a Lightroom tutorial so I don’t go into detail on my LR settings while color correcting / color grading.
Setup:
Before we get started there are a few things you’ll need to do for setup:
Drone
Shoot your photos in RAW (DNG) file-format. (This gives the most flexibility in post-process)
Shoot all images as 5-shot Auto Exposure Bracket (AEB). Merging these images to an HDR image (tastefully) will provide the highest dynamic range possible from your DJI device. This will give you greater flexibility when editing your shot in Lightroom.
Software
Download Nik Collection’s Free Photoshop / Lightroom Filters. Links below per operating system as well:
Update (Oct 2022)
https://archive.org/details/nikcollection-full-1.2.11
Old Links
Have access to Lightroom and Photoshop
So, What’s the Workflow?
1. Take 5 AEB Photos of Subject - Import to Lightroom
Shoot your shot! Go out there and take a few edit-worthy compositions. Remember to shoot in .DNG, Adobe’s Raw file format that DJI uses and utilize the Auto Exposure Bracketing feature to take 5 frames.

2. Photo Merge to HDR
After importing your photos to Lightroom, select all 5, right click and photo-merge them to HDR. This will combine the possible dynamic range across all five exposures, maximizing the editing potential into 1 merged .DNG.

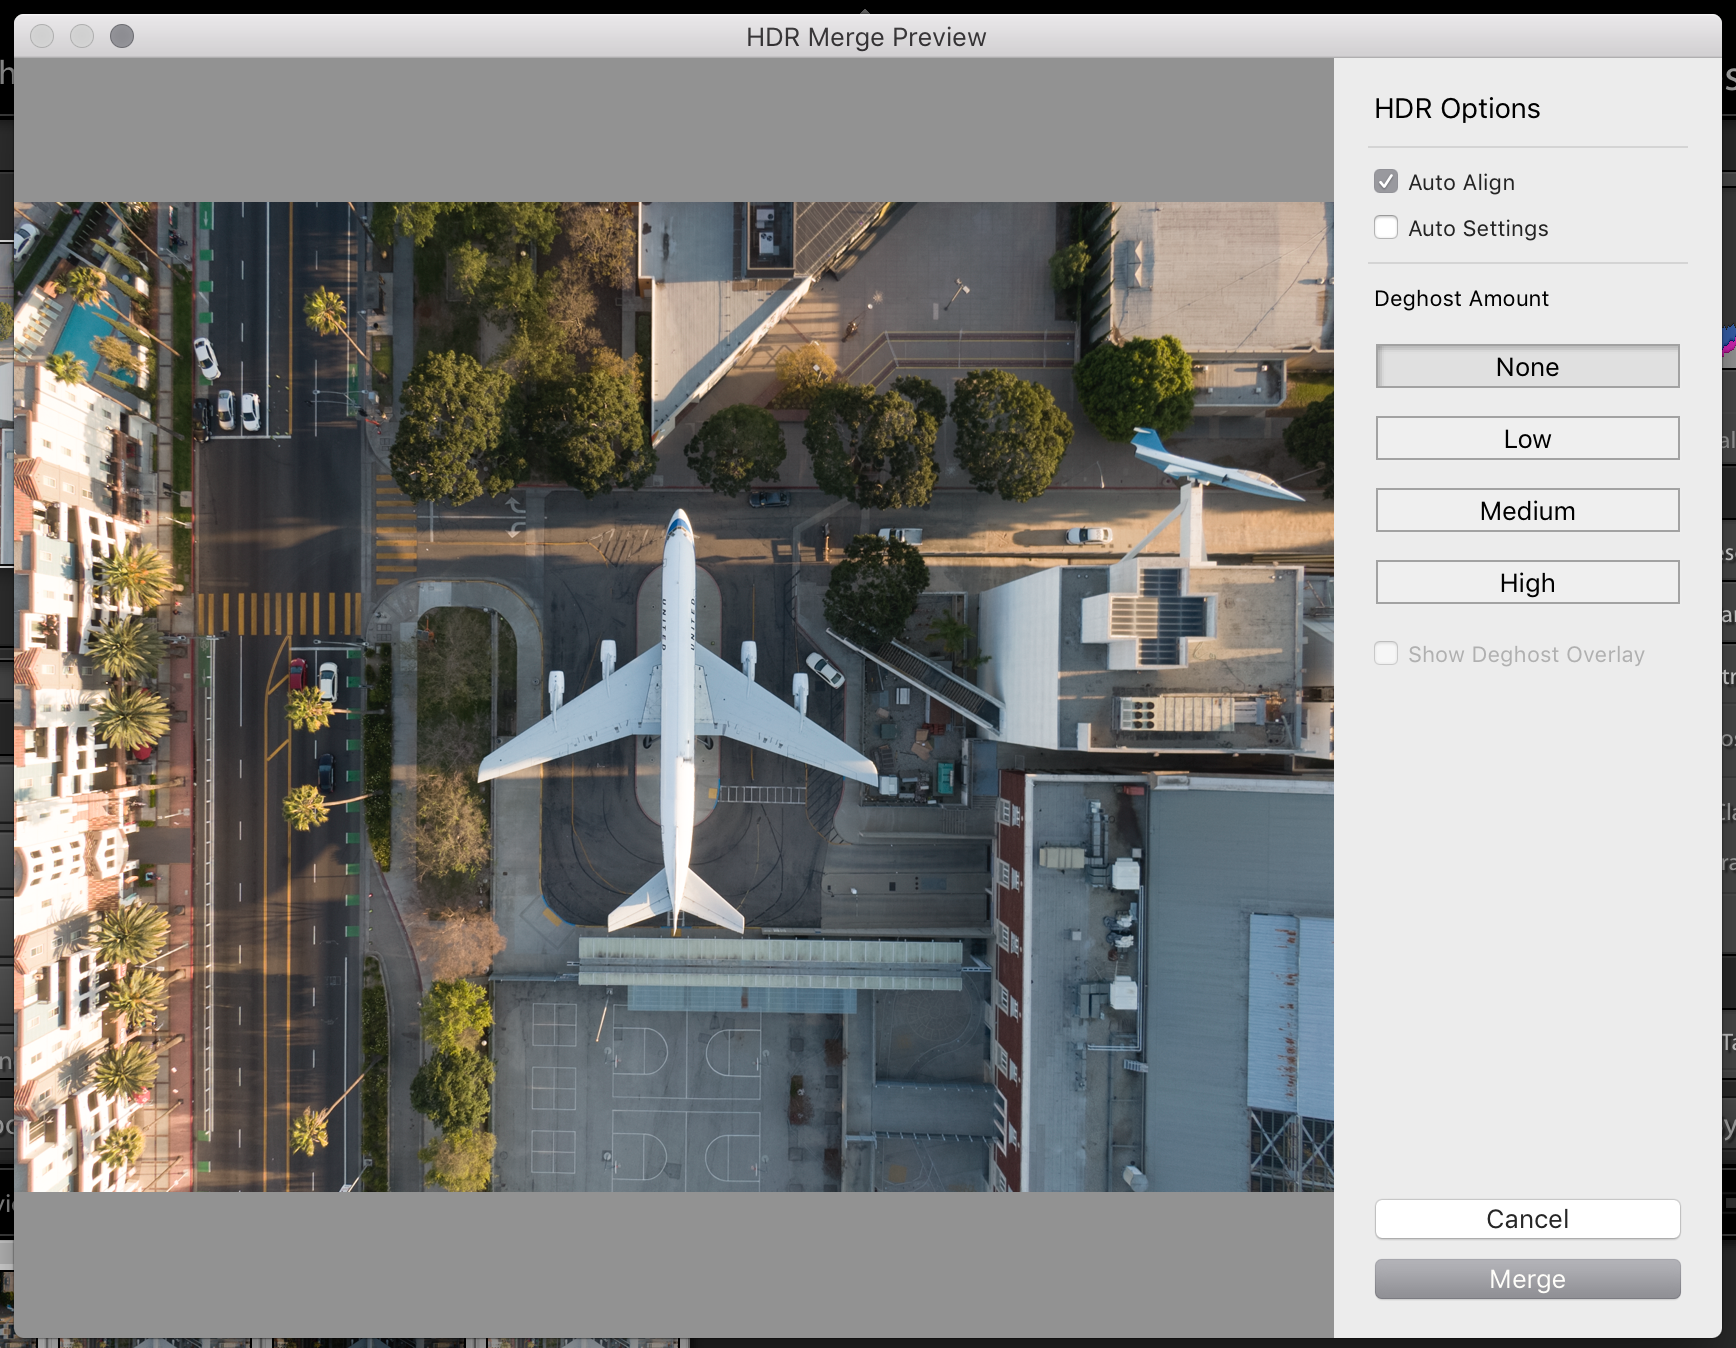
3. HDR Settings
Set DeGhost to none and check the box for Auto-Align. Then click merge.
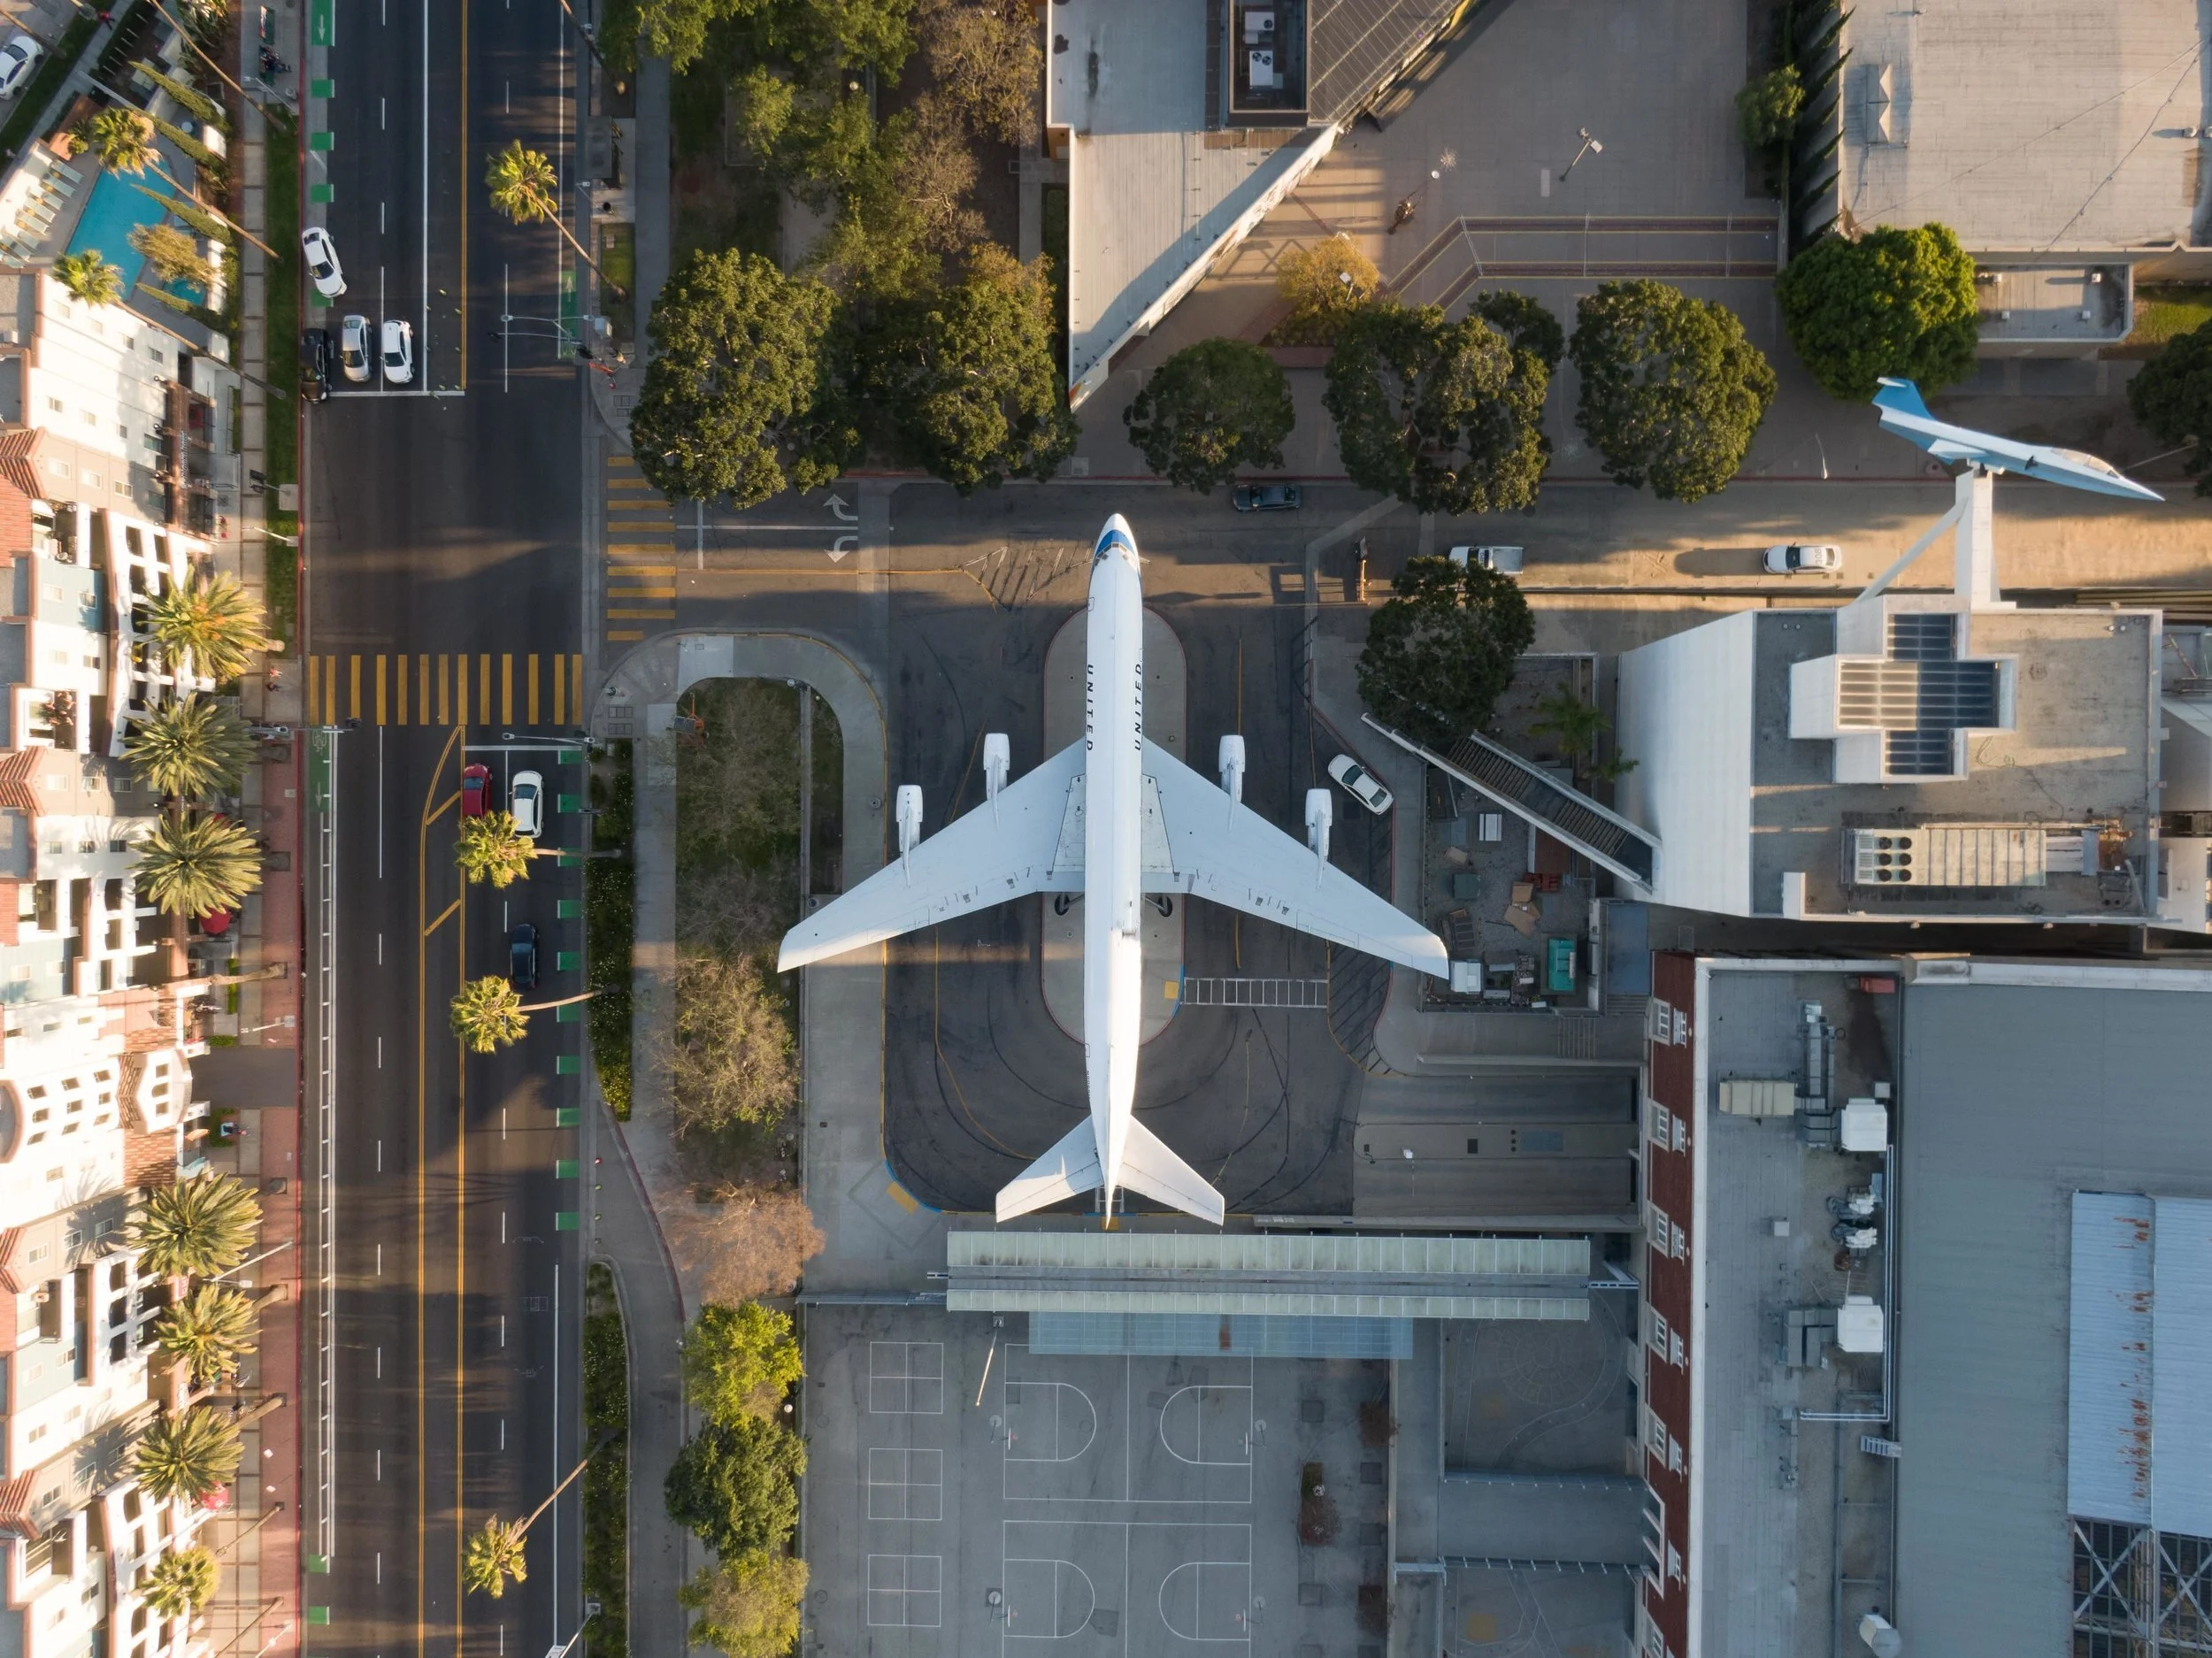
4. HDR Image - Unedited
Here’s what the unedited HDR image looks like.
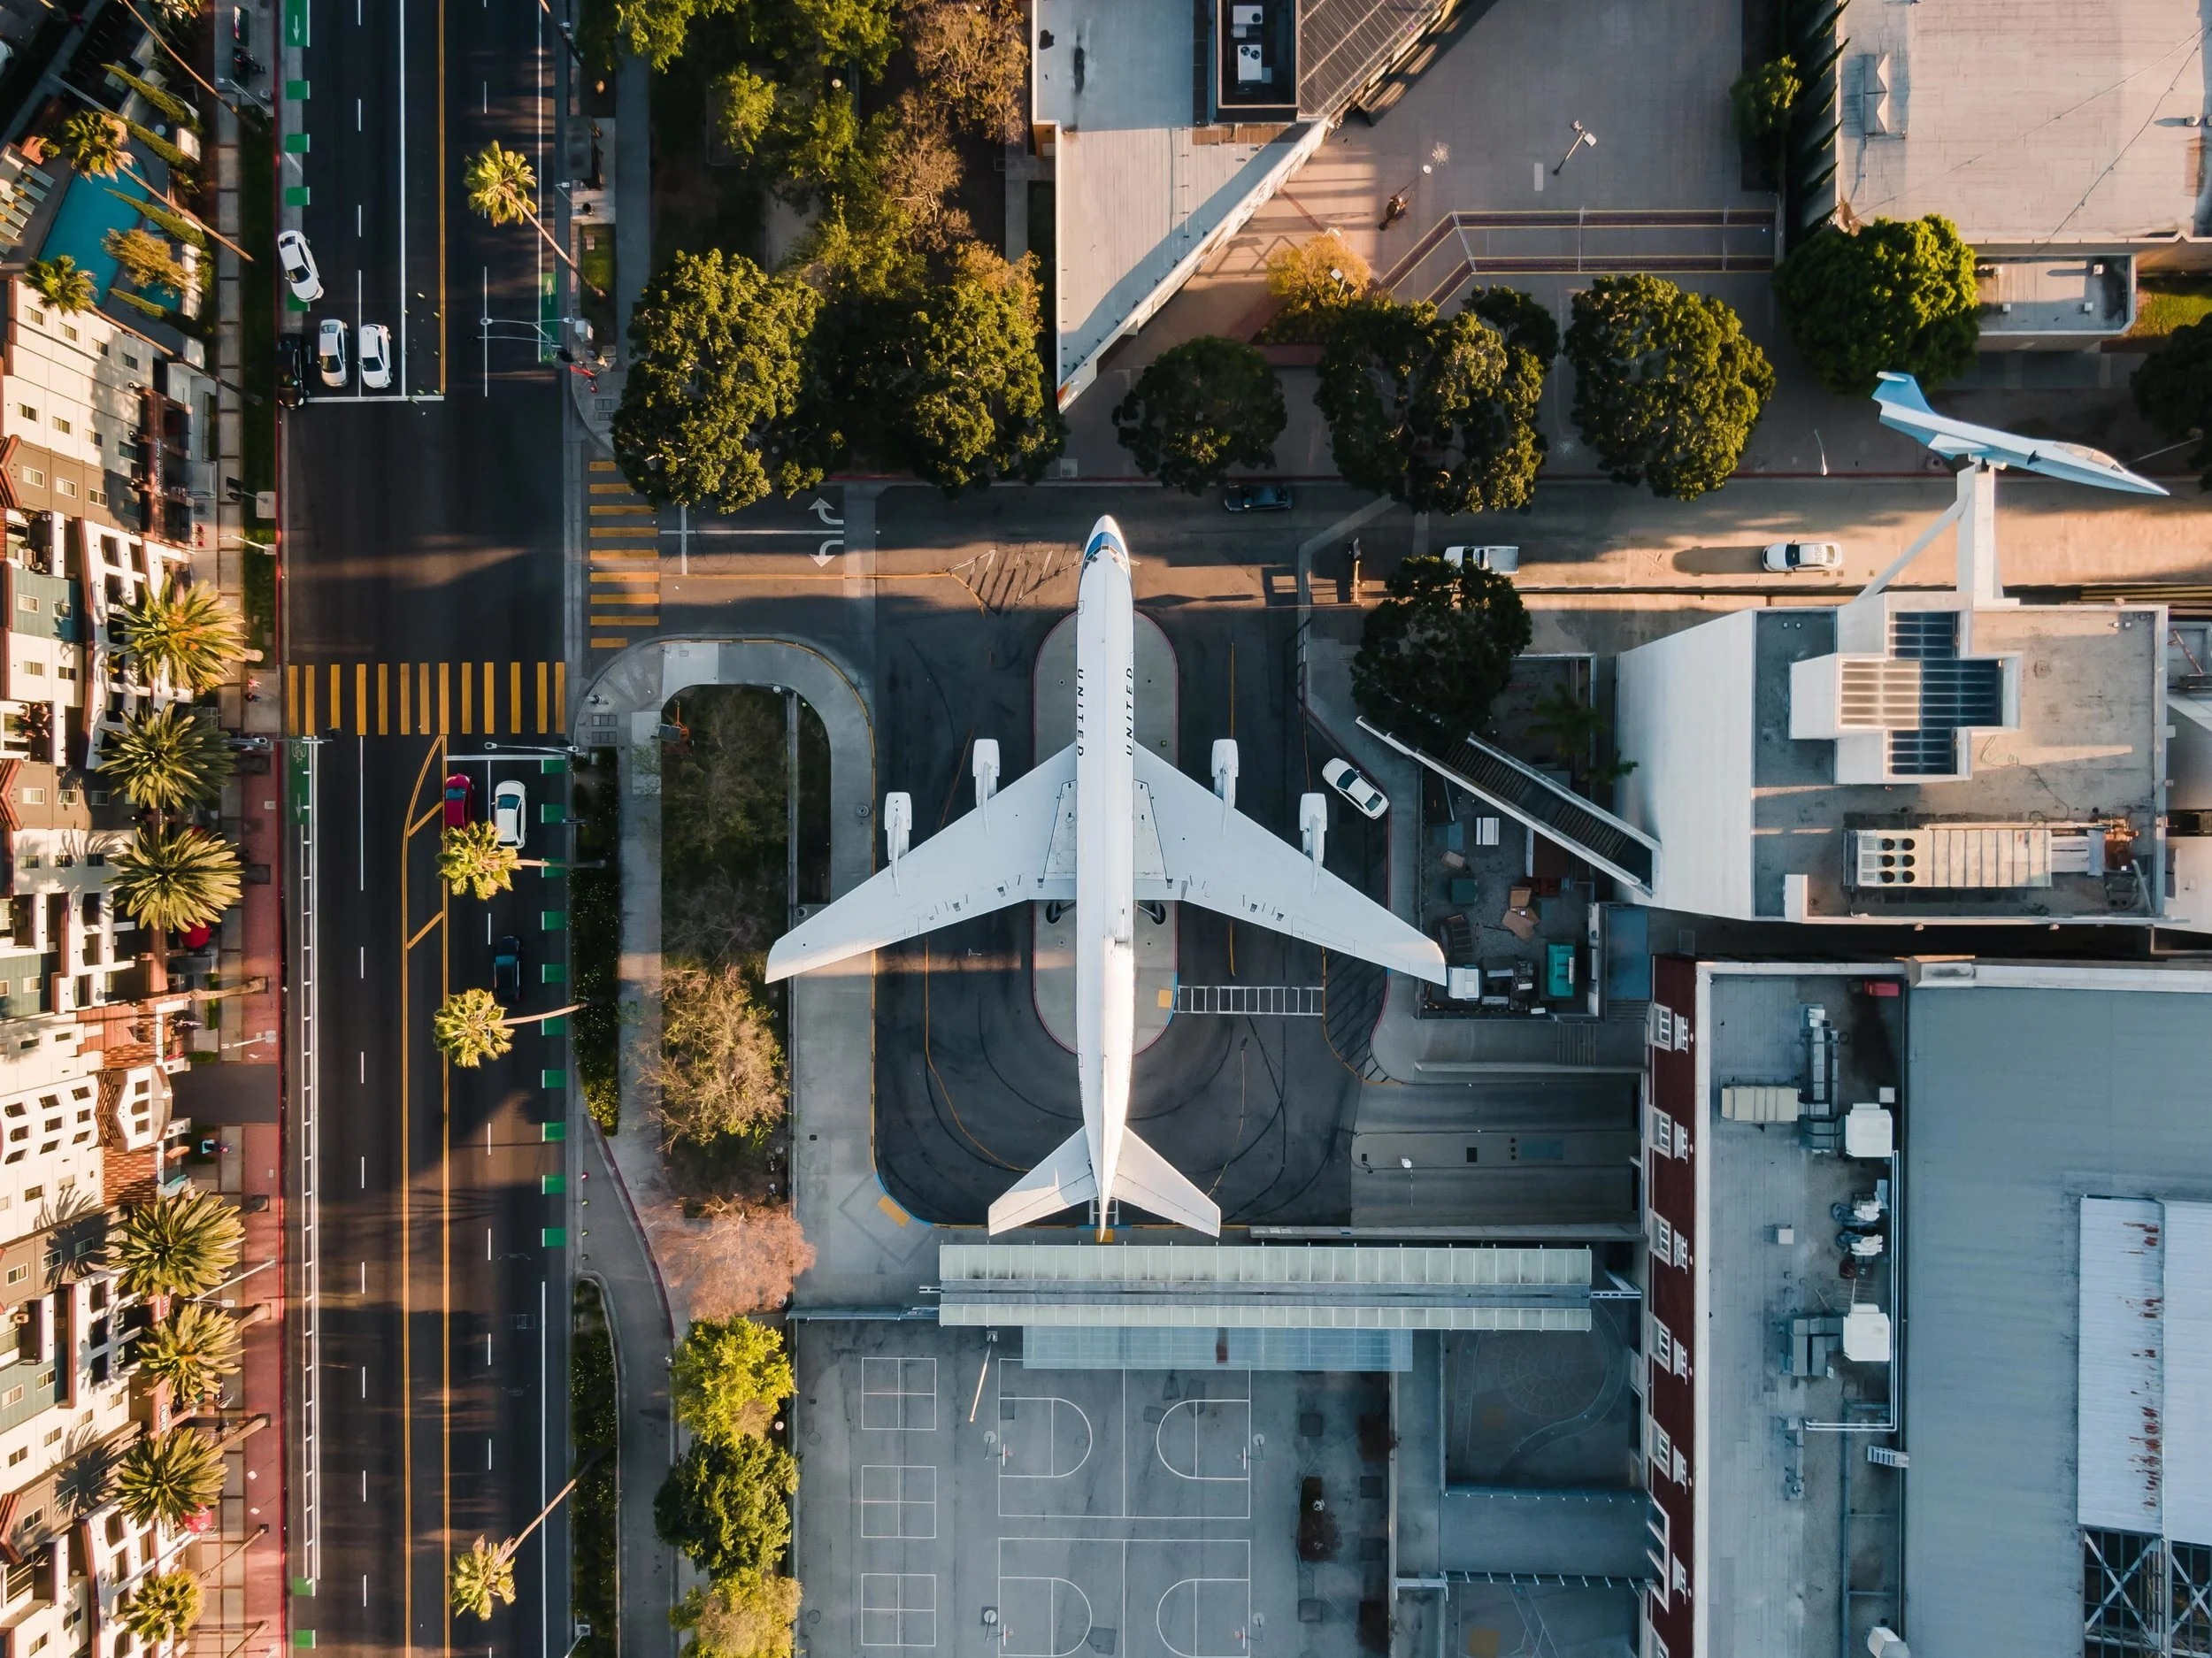
5. Edit Photo in Lightroom - Per Usual
Edit your shot in Lightroom as you normally would. Since this is not a Lightroom editing tutorial, I won’t break down this specific edit. All photos are different and require different types of color grading. Here’s what this shot looks like after touching up in Lightroom. Not bad, but we’re not done yet!
6. Edit in Photoshop
Right click the edited HDR image in Lightroom and select Edit In > Photoshop.

7. Nik Collection
If you downloaded Nik Collection, you’ll notice this dialogue box now appears when you open Photoshop. You can ignore this / close this since we will access the Nik Collection through a different menu.
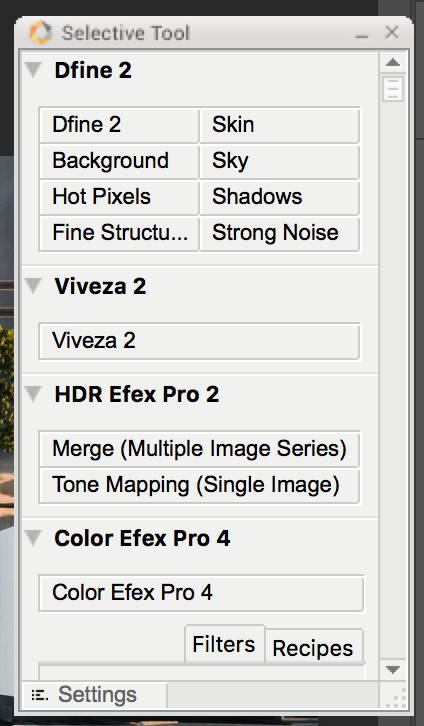
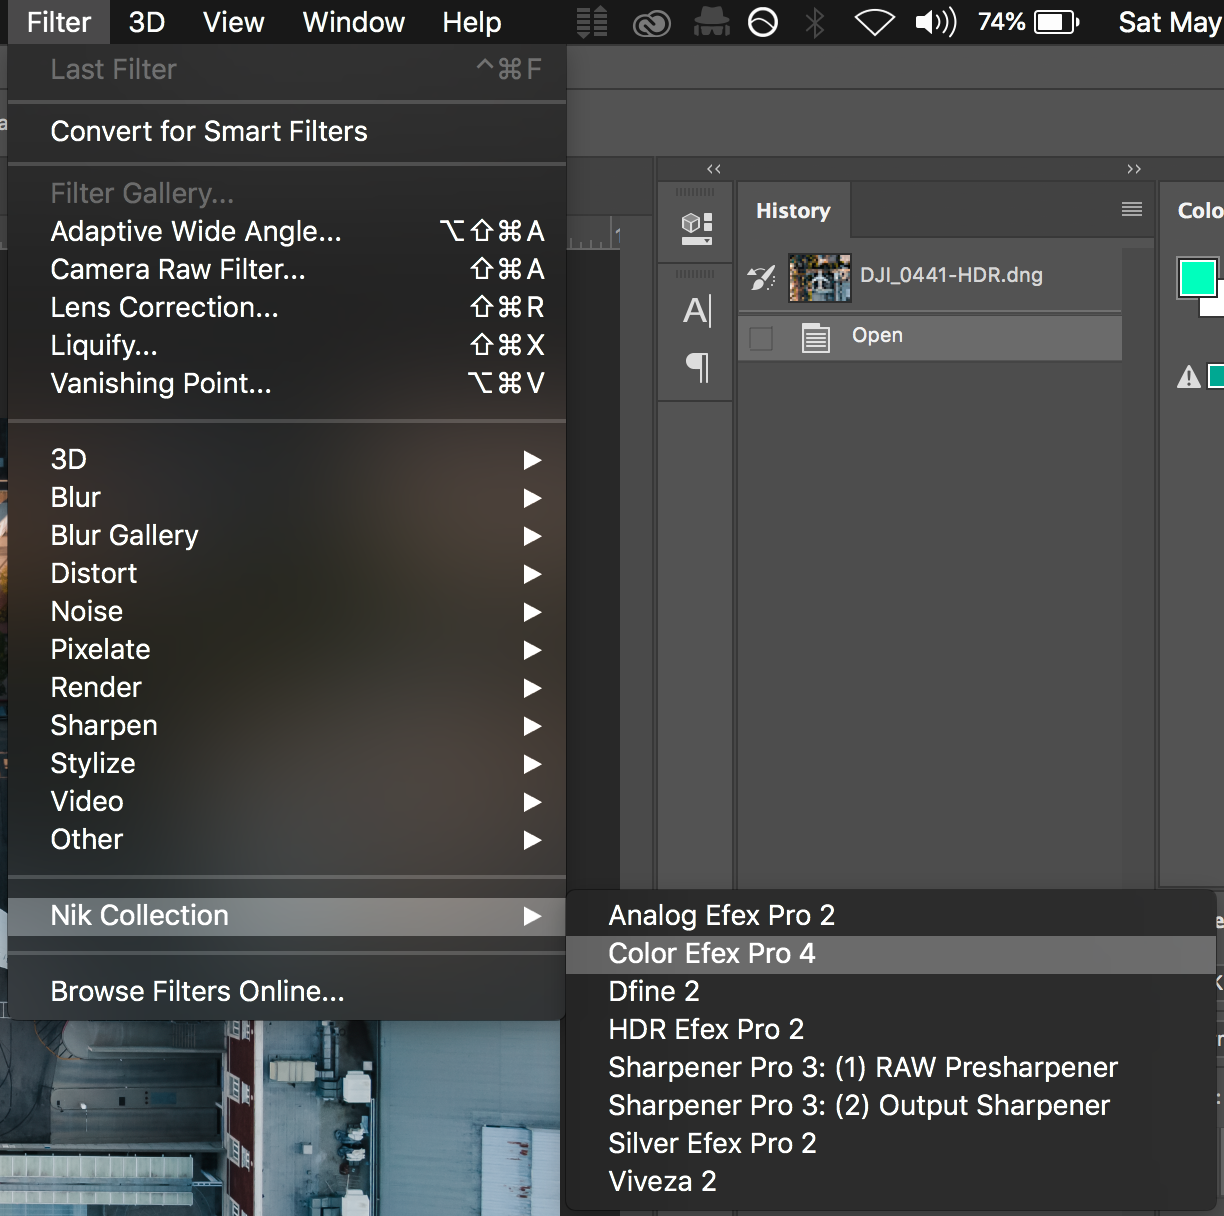
8. Nik Collection - Color E Fex Pro
Navigate to Filter > Nik Collection > Color E Fex Pro. A new window will pop open where you can select various kinds of filters to apply to your layer.
9. Tonal Contrast Filter
Add Tonal Contrast Filter with the pictured specifications:
Highlights 10% // Midtones 15% // Shadows 10%
Then click ‘+ Add Filter’


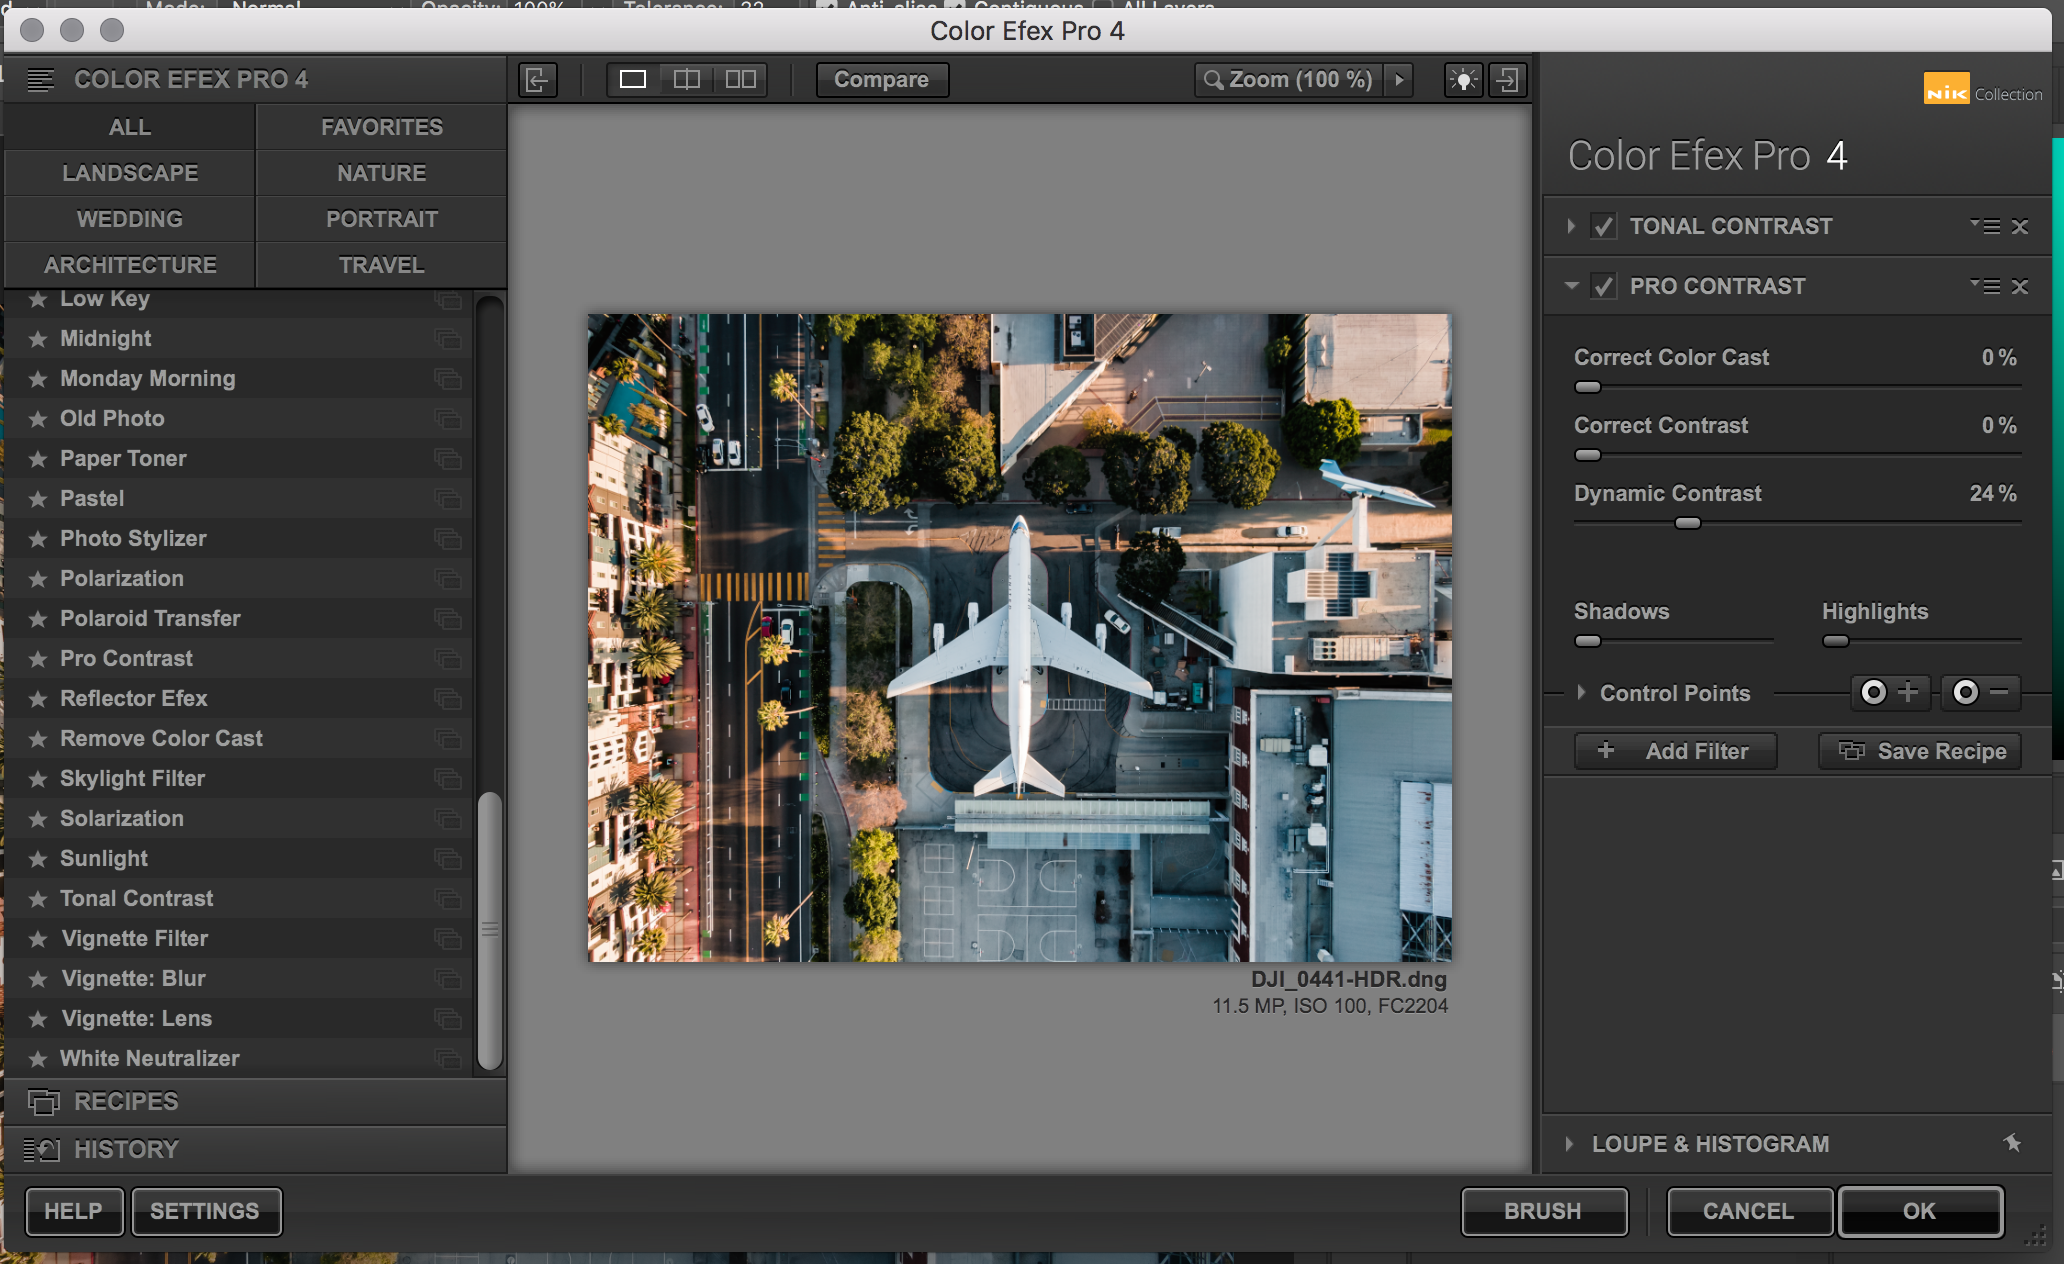
10. Pro Contrast Filter
Add Pro Contrast with the pictured specifications:
Correct Color Cast 0% // Correct Contrast 0% // Dynamic Contrast 24%
Then click ‘Okay’ to apply the filter.
Optional - In my case, since I use this configuration a lot, I have saved this combination of filters / settings as a Nik ‘Recipe’ and named it “DJI Drone Photos”
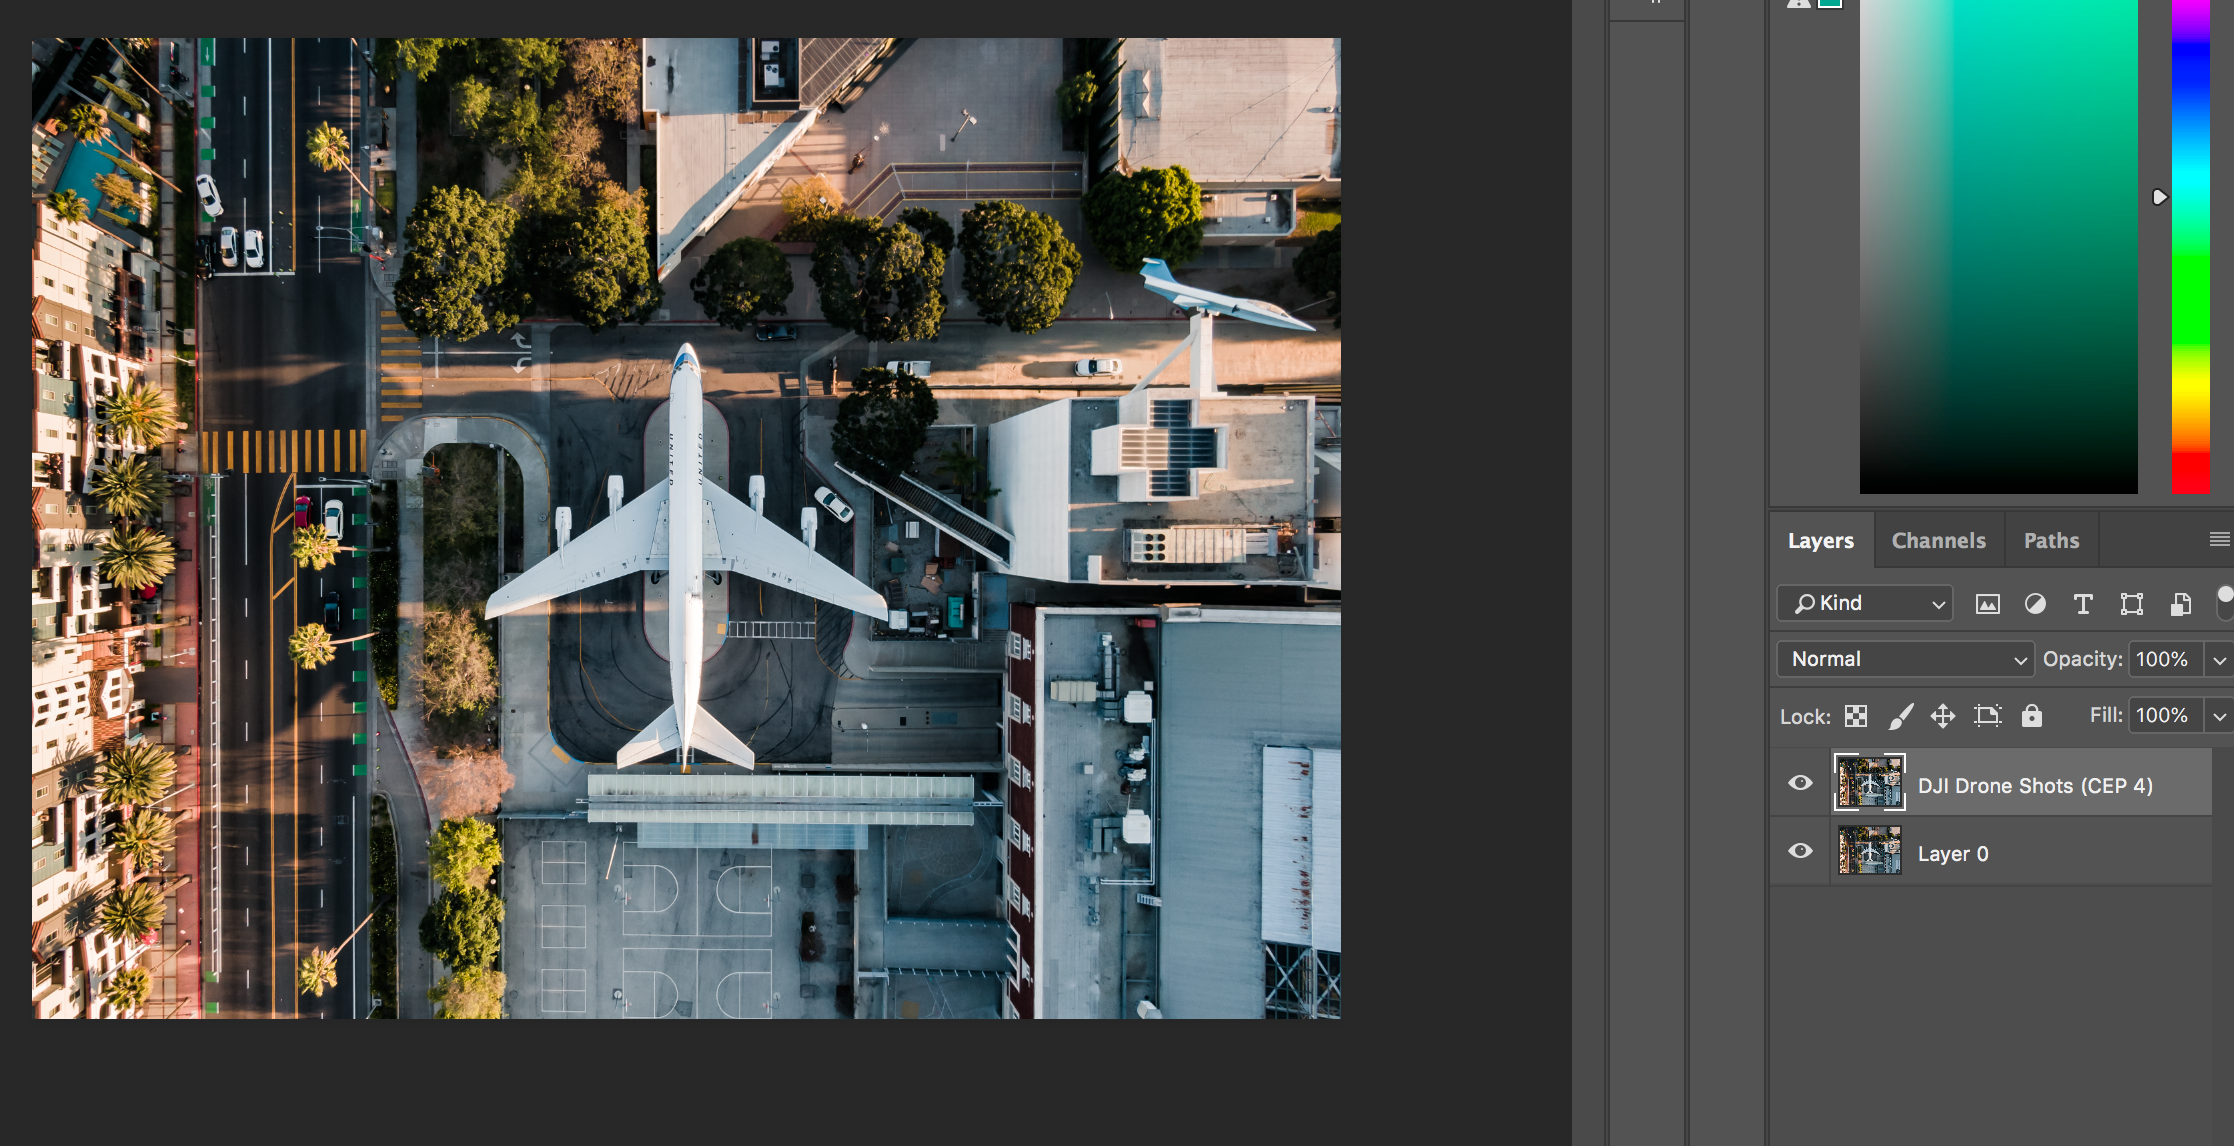
11. Toggle Nik Layer and Assess
You should now have 2 layers, toggle the Nik layer to see its impact. Notice any differences? Is the edit too extreme?
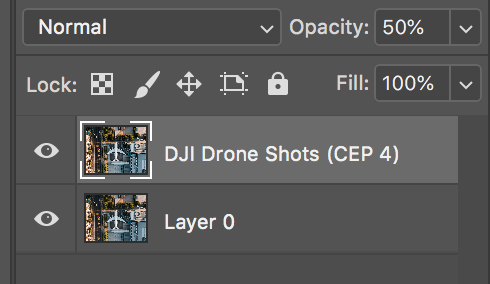
12. Adjust Opacity of Nik Layer
You can adjust the intensity of this layer by using the layer’s opacity slider. I usually slide this down to about 50% - but play around and see what works best!
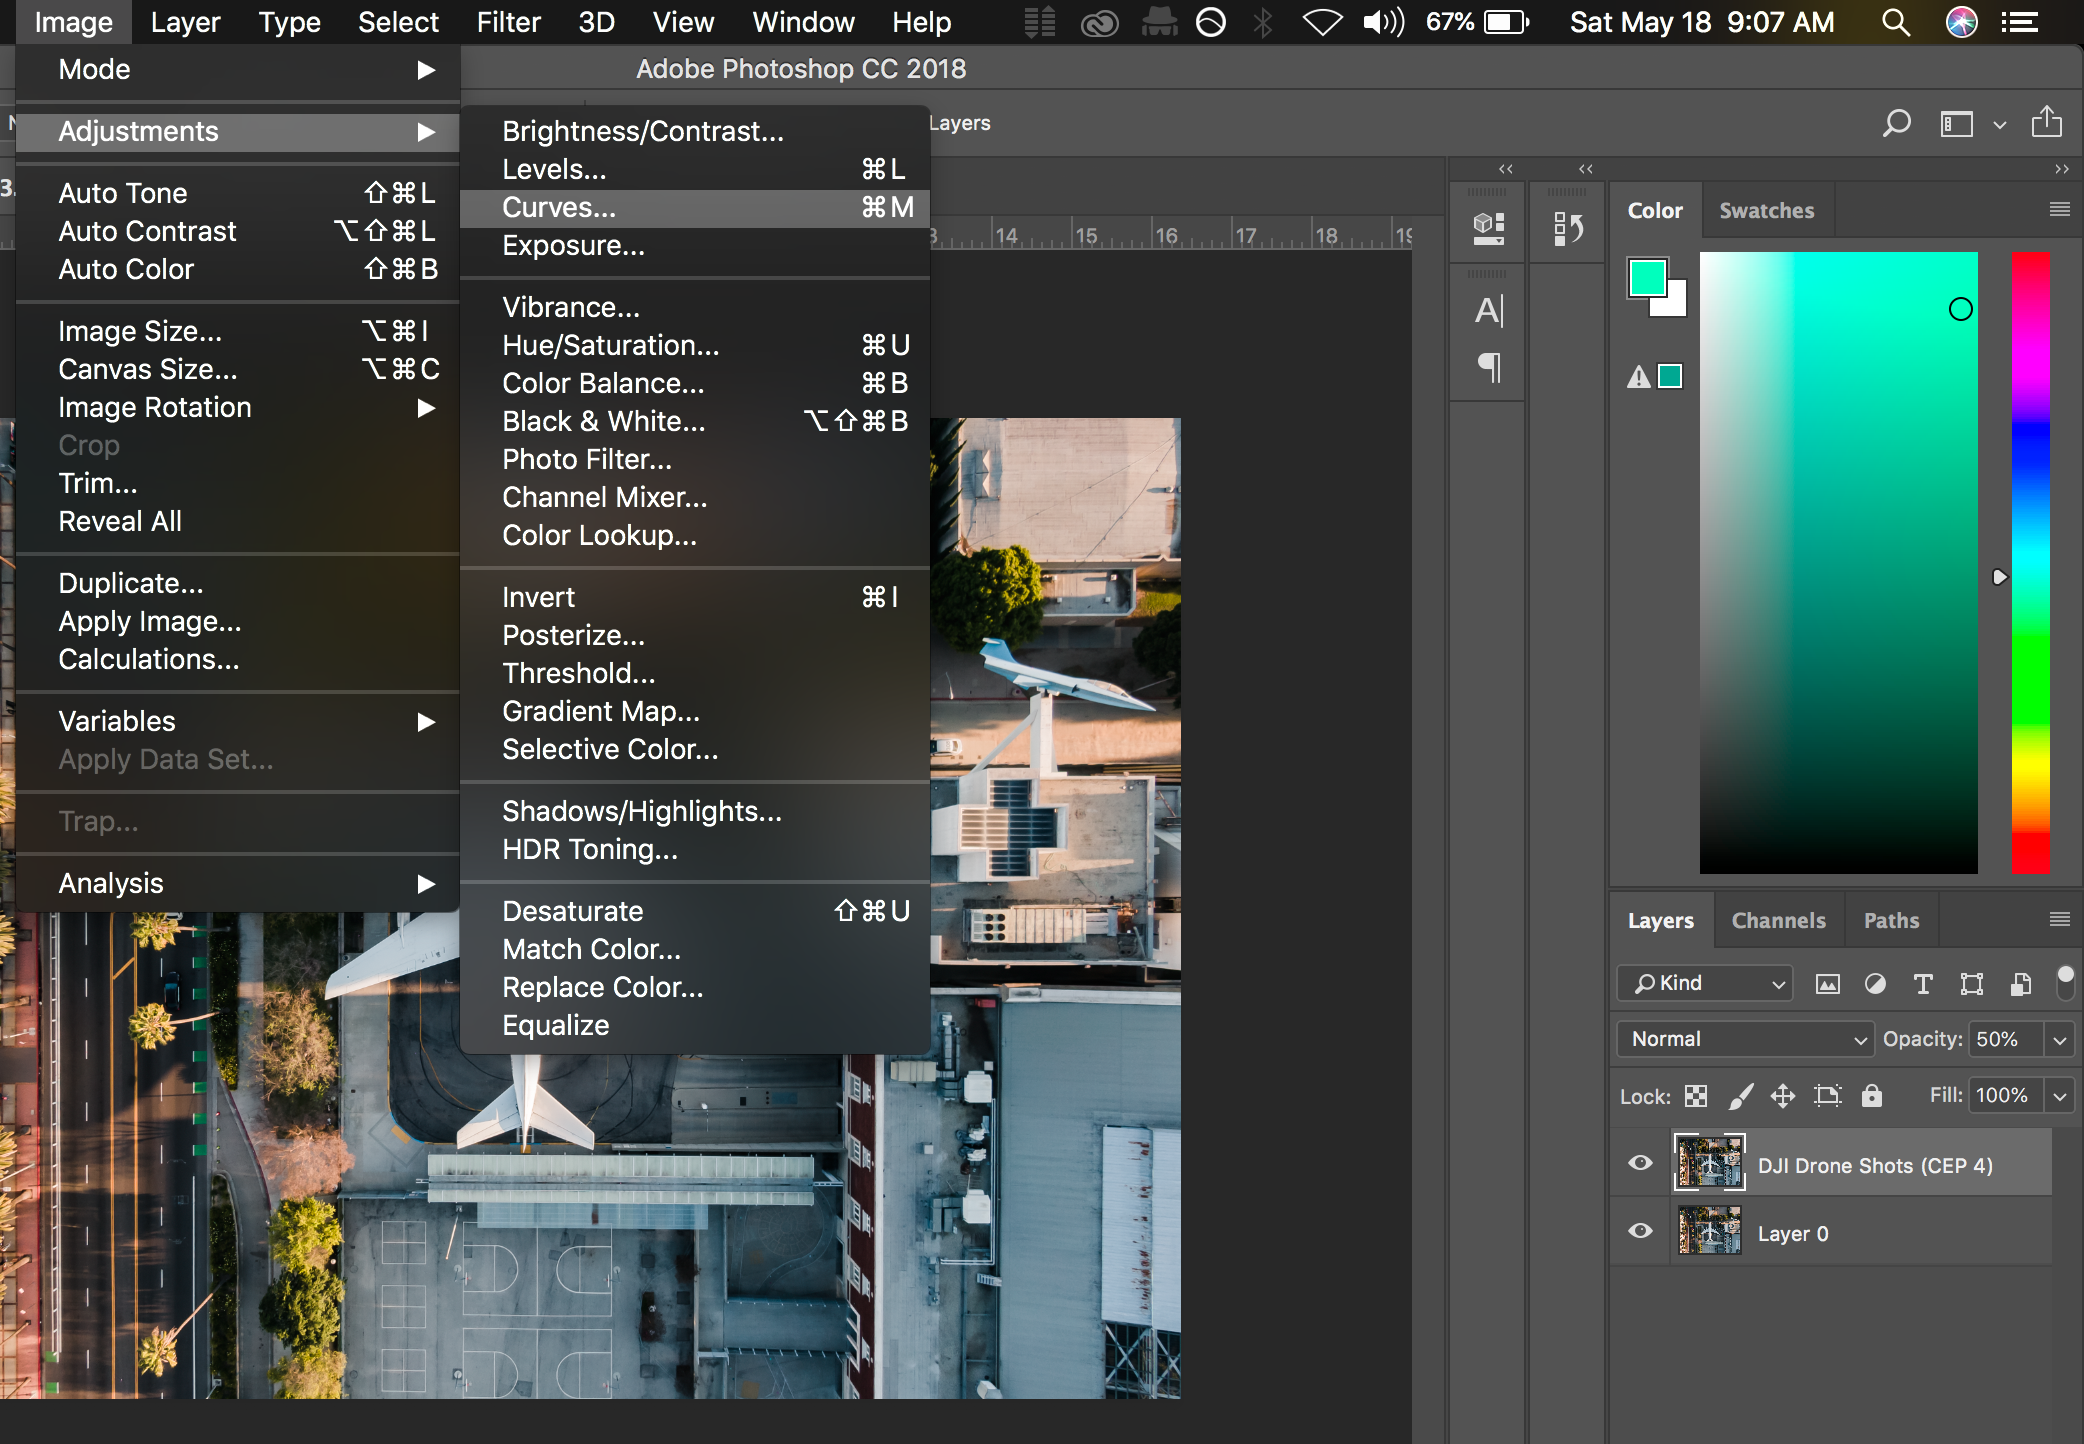
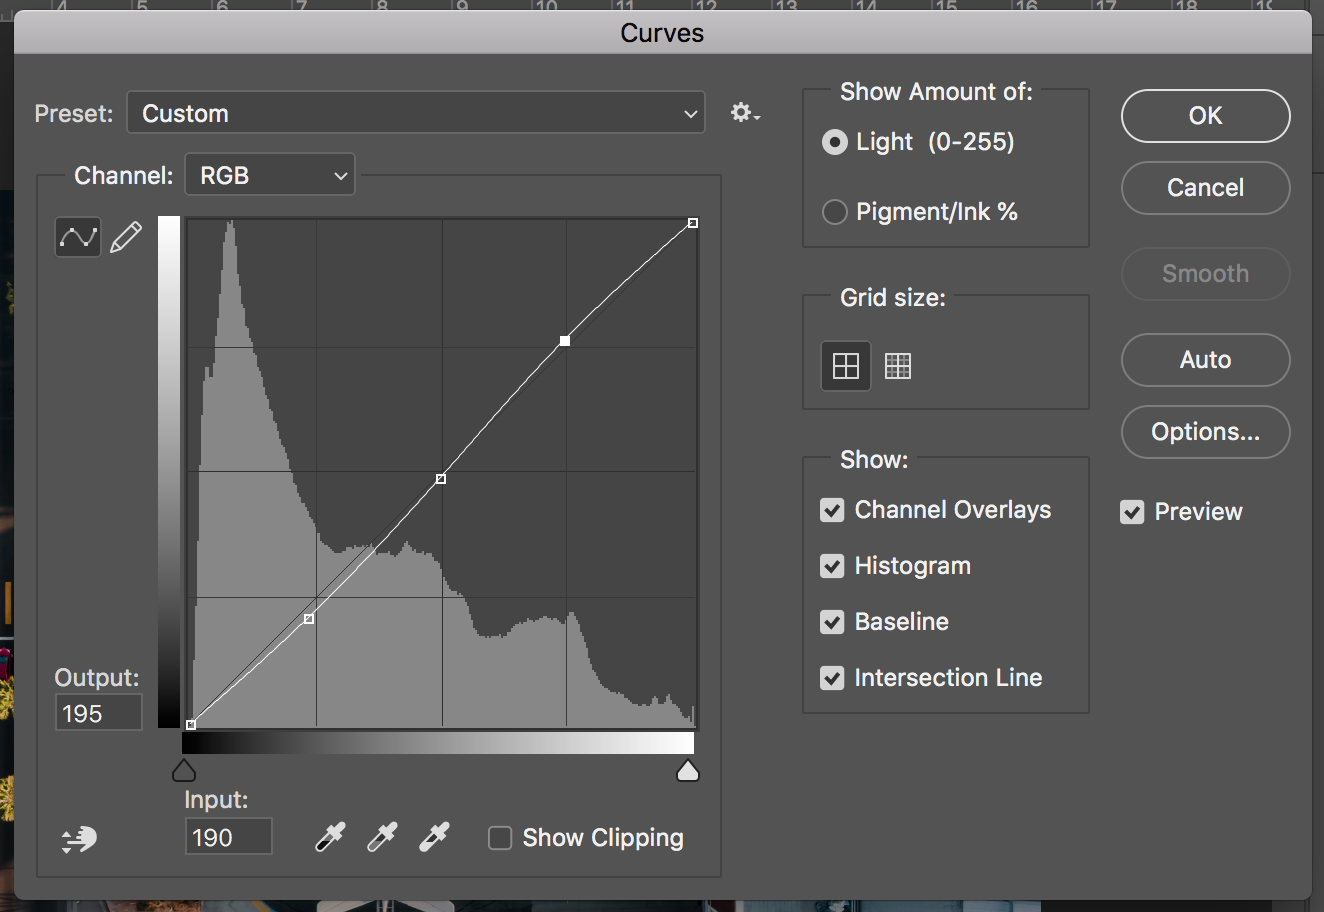
13. The Gentle S Curve
Adding a little more contrast to the image usually helps your Blacks and Shadows look less muddy / more crisp in post-process. Select the Nik Filter Layer and go to Image > Adjustments > Curves. Once there you’ll create a gentle S-Curve and click ‘Apply’ to lock in the change. The curve is now applied to the Nik Filter Layer.

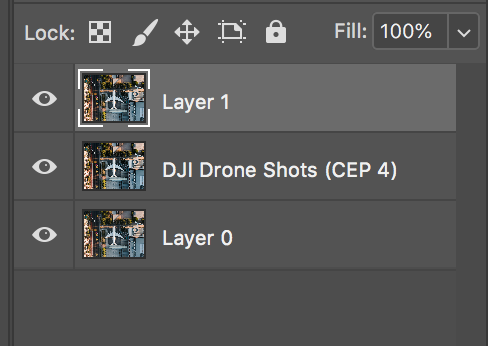
14. Create New Layer from All Visible Layers
Press Command + Option + Shift + E to create a new layer from all the current layers in view.
(PC: Ctrl-Alt-Shift-E)
15. High Pass Filter
Apply a high pass filter to the newly created merged layer. This will create an abstract-looking outline of the prominent features in the image.

16. High Pass Filter
Set the pixel radius to 5 pixels, this will increase the pixel radius of the prominent features to 5 pixels and further outline the structure of your image.

17. High Pass Filter - Sharpening
The High Pass Filter has now essentially highlighted the distinct lines in the your image. Don’t worry, this is not the final view, since it looks like a bad abstract line-drawing. Ultimately, this view becomes a sharpening layer with the right switch.

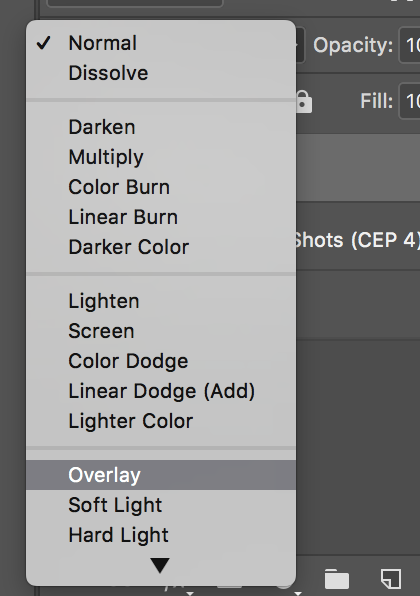
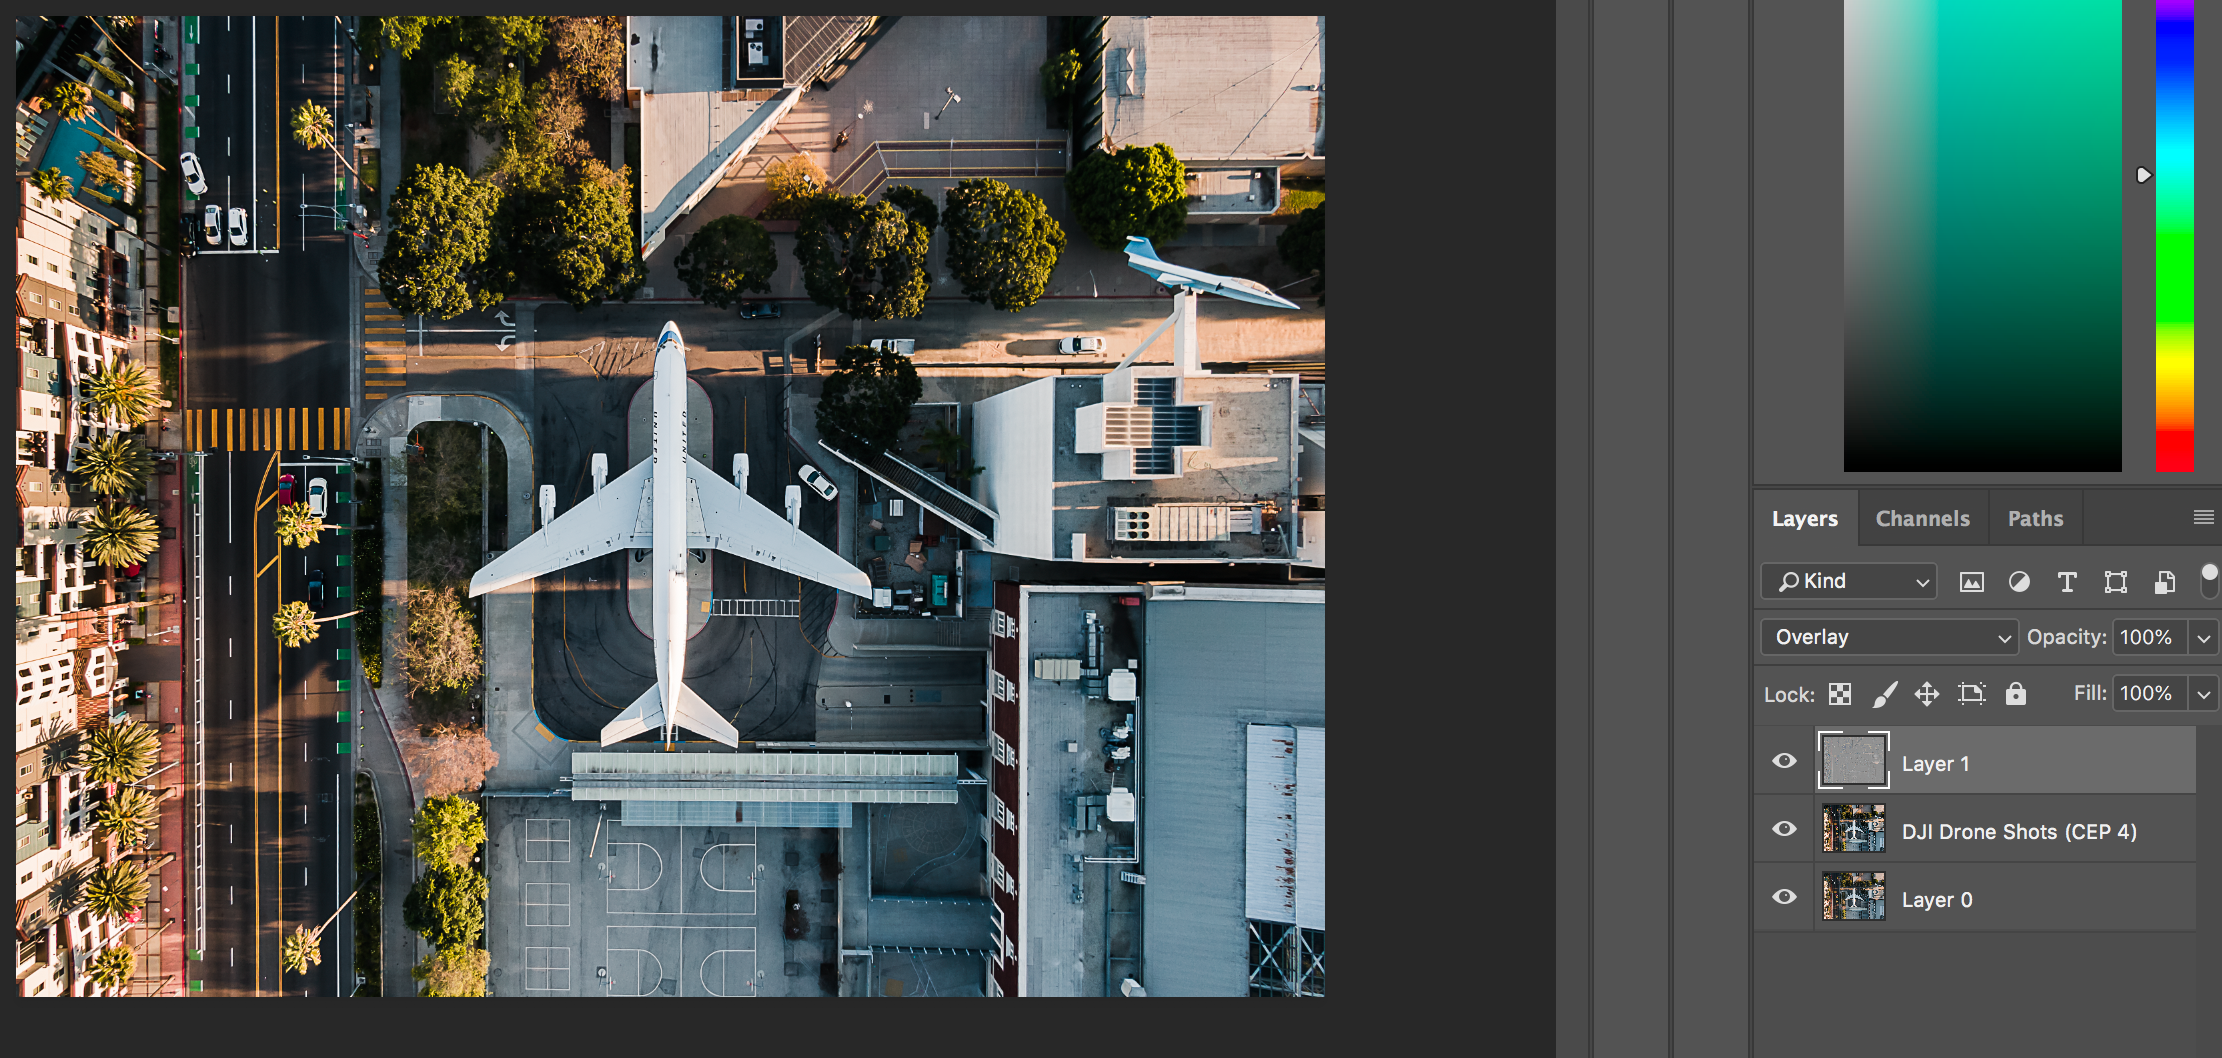
18. Blend Mode - Overlay
Once you change the layer’s blend mode to Overlay it essentially overlays only your distinct image outline on top of your image, increasing the sharpness and definition of your image. Though this is not required for most images, DJI cameras are small and forever-improving. I’ve found image sharpness to be a drawback of shooting with these drones, though this setting drastically improves image’s overall definition.
19. We’re Close!
We’re almost done, now that our High Pass Filter has been applied here’s what the image looks like at this stage.
It looks pretty good, though the sharpness / definition might be a little too much.
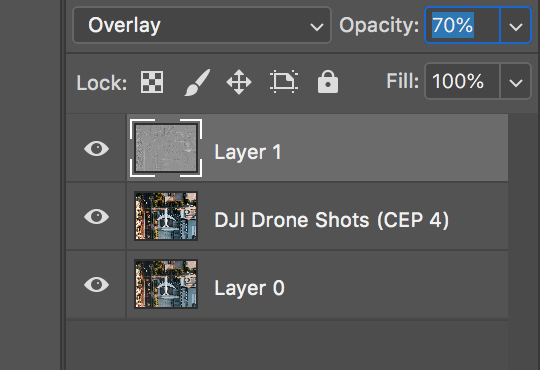
20. High Pass Filter - Overcooked?
If your image looks a little overcooked, you can adjust the opacity slider on the High Pass Filter layer as needed. A good range is usually between 40% to 70%. It depends on the image and lighting. In this case, I’ve adjusted the slider to 70%
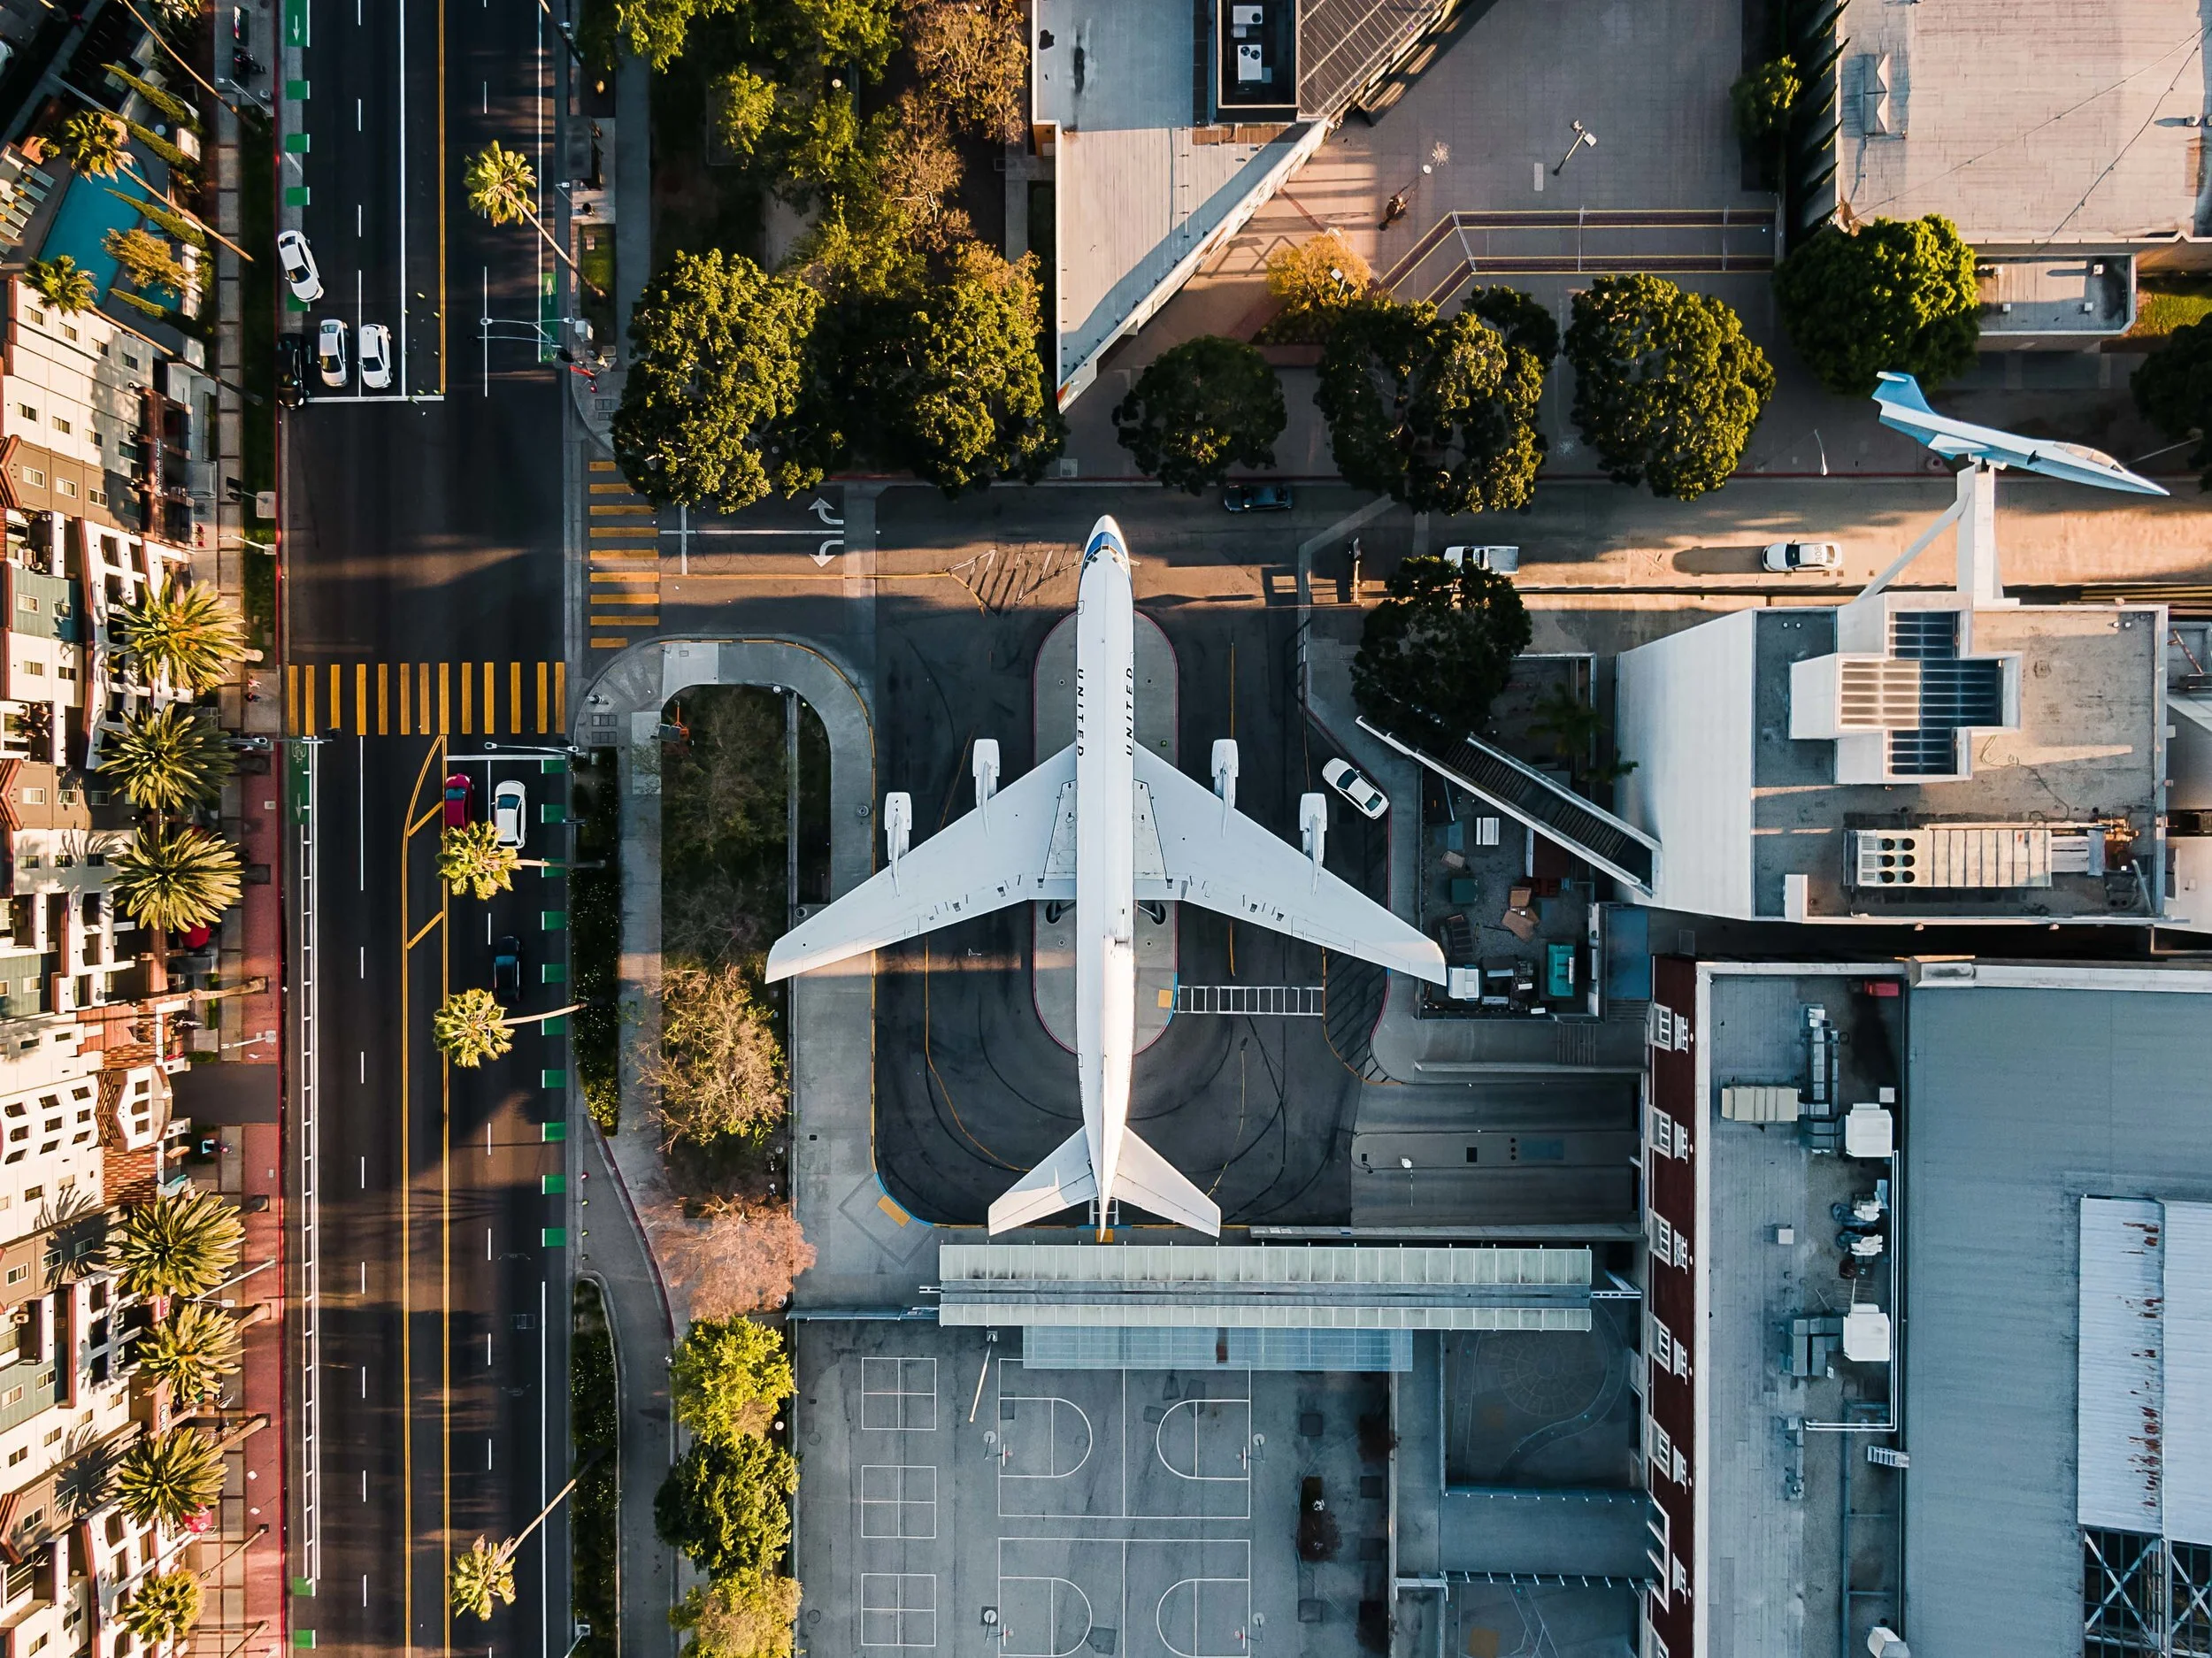
Final Image
Here’s the final result! Let us know if you end up adopting this method to edit your drone photos! If you found this article useful, feel free to share the link with a friend!
If you enjoyed this article, feel free to check out our Aerial and Timelapse YouTube Channel!