
Photographing Warp Speed - A Guide to Underground Motion Blur

Camera - Nikon D750
Written and Photographed by Mike Lindle
Intro
Have you ever seen those beautifully blurred photos of underground tunnels and wondered how the artist pulls off the effect? When I first saw these kinds of images surface a few years back (I was still a novice photographer), I immediately assumed the method involved a few fancy Photoshop techniques.
** Little did I know, you could actually achieve this effect entirely In-Camera! **
With a little planning and a steady hand, you too can achieve this effect. To finish the concept, you can really get the colors to pop with very minor color-grading in Lightroom!
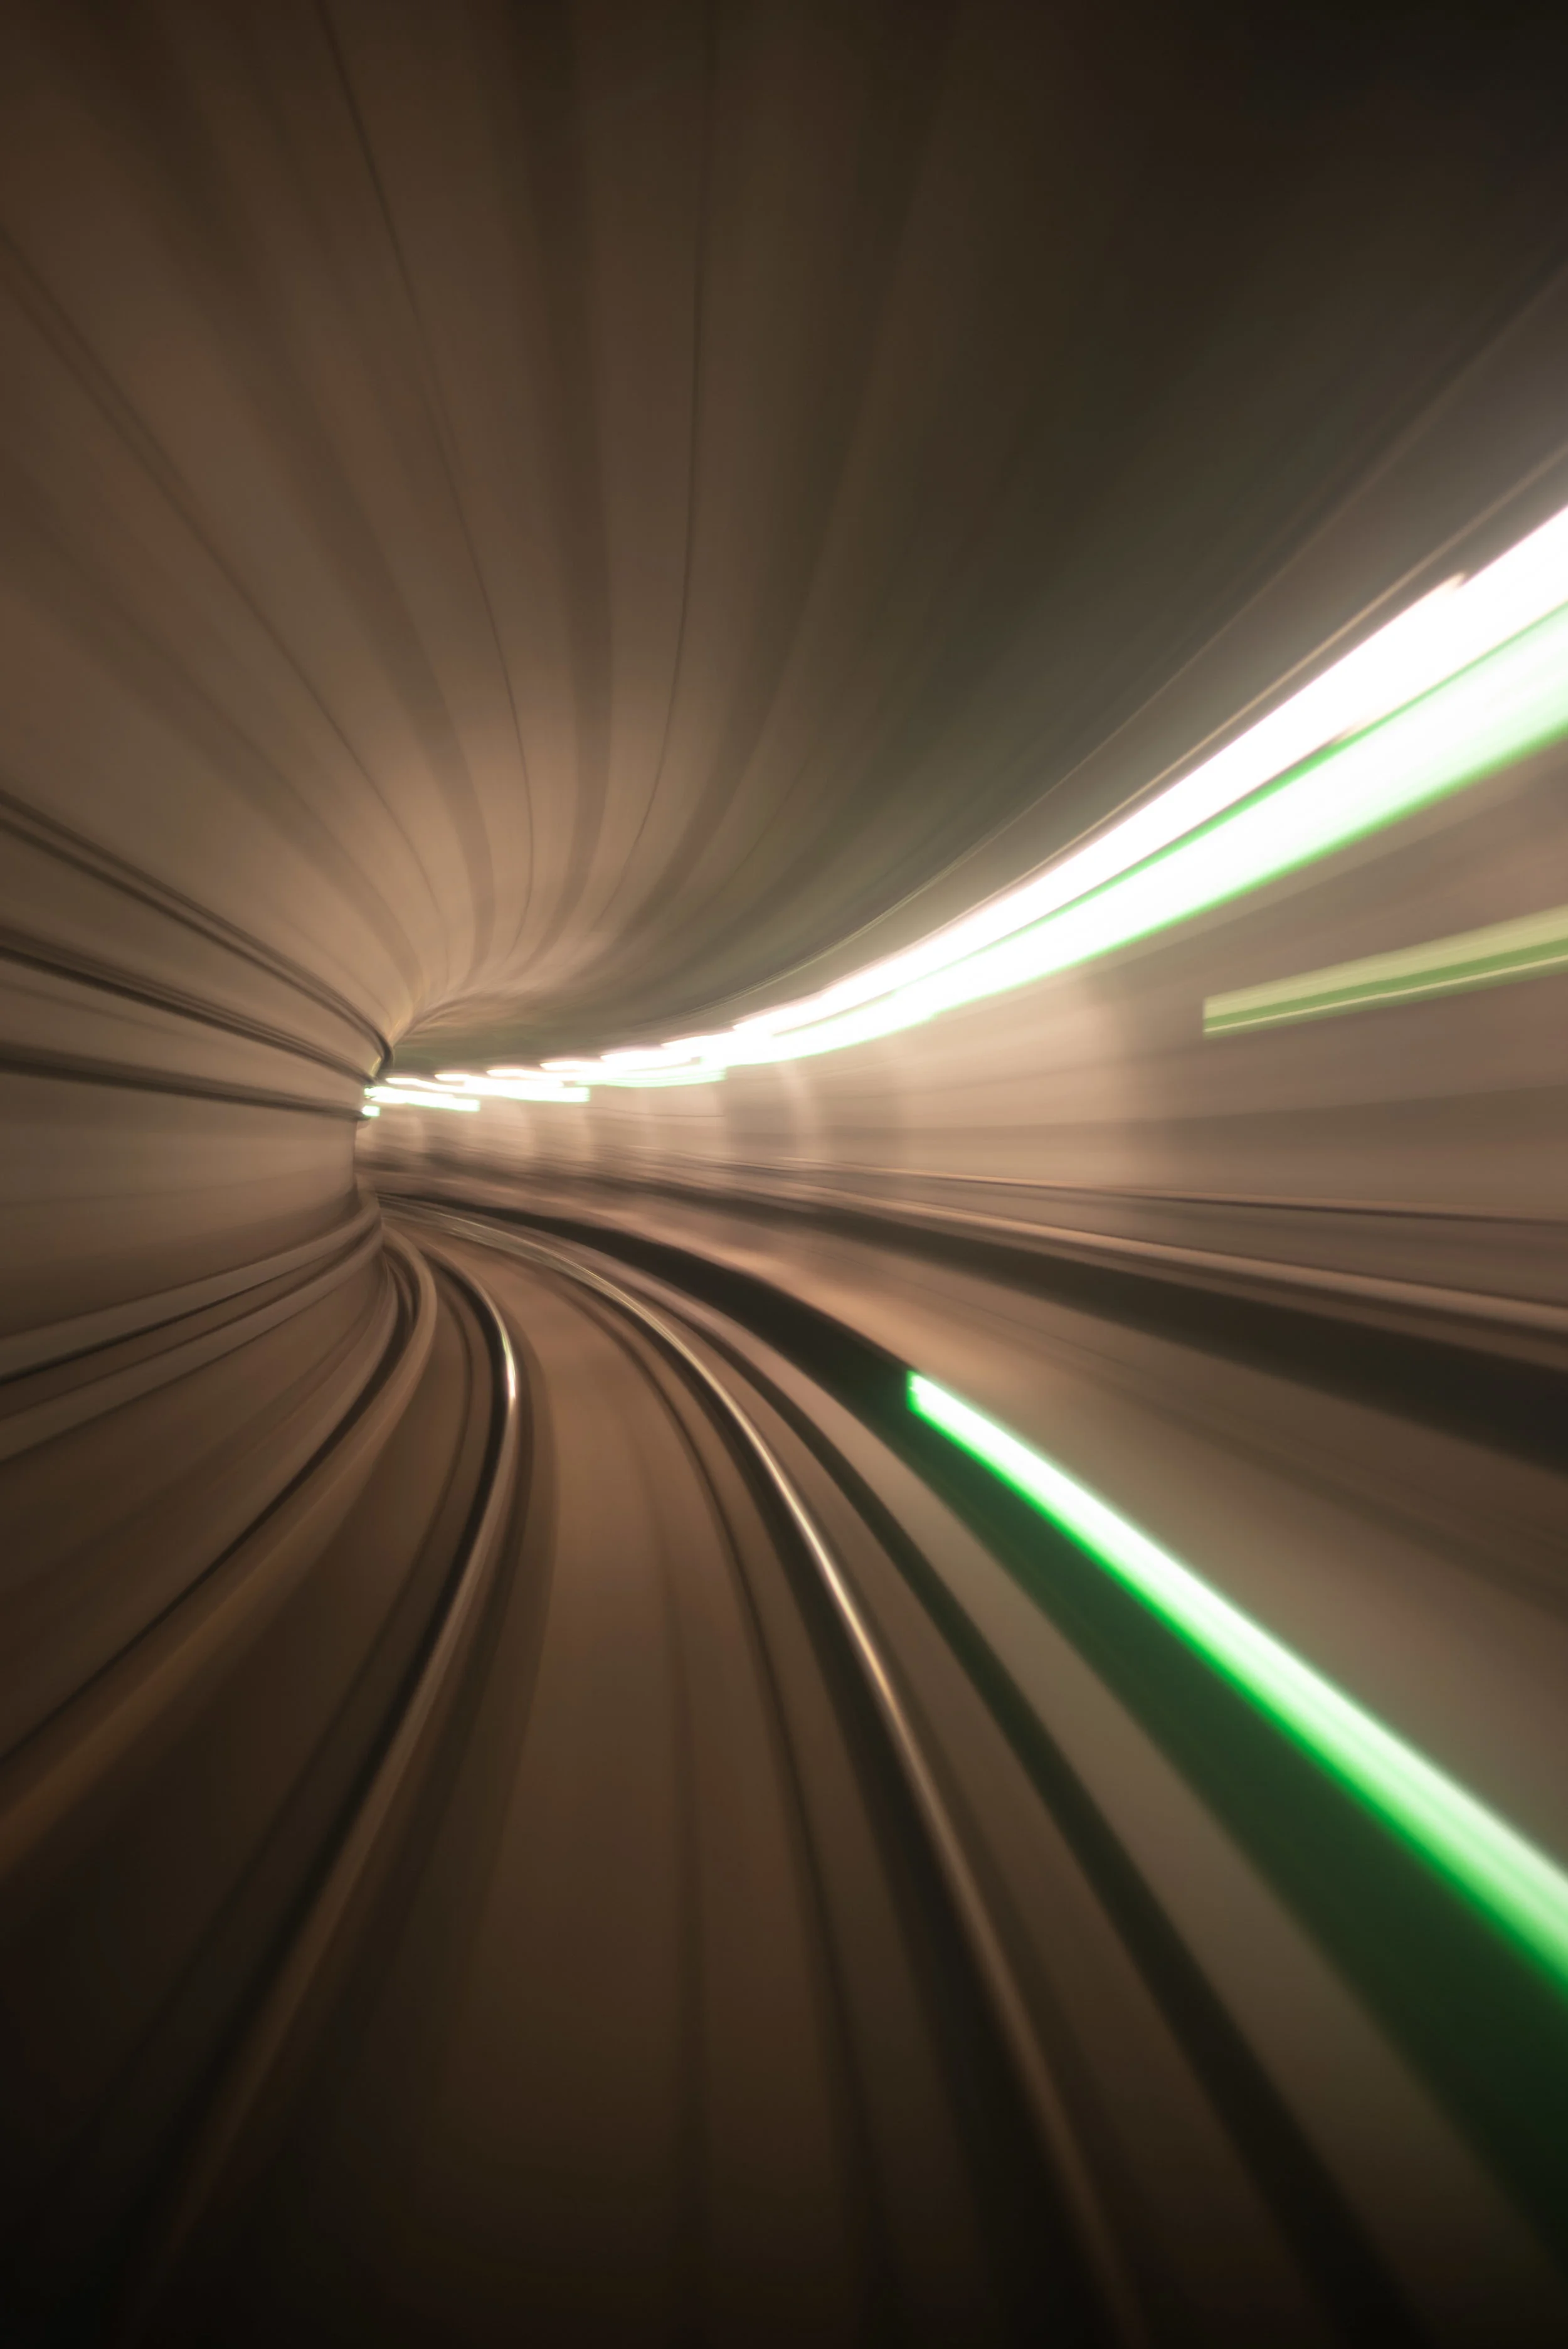
**Here’s the unedited version!**
Camera Settings
I’ve included the settings I used for the images above, keep in mind that different underground tunnels will have different kinds of available light! You’ll want to prioritize your shutter speed first by shooting at 1/2 - 1 ish seconds per photo. Then you’ll want to open your aperture as wide possible to let in the available light. Finally, adjust your ISO to properly expose for the photo so it’s not too over or under exposed. Keep reading along for more tips on how to execute the shot!
Shutter Speed - 1 sec
Aperture - f/1.8
ISO - 100
Location
Finding the right place is critical for this concept to work! A no-brainer way to start is to scout your closest city for underground trains / subways / metros or the like. You’ll want to find a train with a front facing or a back facing window. Usually conductorless-trains or older subway lines will have these windows.

Here’s the view from a back window!
Shortened Long-Exposure
Please think about this header before you execute this concept. You will be on a train, likely with a lot of other people, shaking around as the train moves. You will not be able to set out a tripod, and even if the train is empty, your tripod will get shaken around as the train rattles down the track. That said, you will need to take the photo as a long exposure. That doesn’t mean you’ll have to expose for an unreasonable amount of time to execute without a tripod. For the best results, I’ve found that exposing your photos between 1/2 -1 ish seconds is usually the sweet spot for properly creating the drag factor for these kinds of images.
Minimize Glass Reflection and Glare
This is a simple concept but the closer your camera is to the glass, the less glare/reflection you’ll see in your image. When I’ve shot this concept in the past, my camera lens is either flush against the glass or as close as possible, with at least 1 portion of the edge of the lens’ circumference pressed against the glass.
If you’re still getting too much glare try using a Lens Skirt (I always carry one around if I’m shooting through glass and need to cut reflection and glare). If you don’t own a Lens Skirt, you can also try using a sweater, jacket, or flannel to cover your camera and the surrounding glass near the lens to minimize / cut glare.

Stability
To create the motion-blur and drag effect in your photo, not only do you need to expose your photo for 1/2 - 1 ish seconds you’ll also need to ensure that your camera stays perfectly still as the train pushes along. Since you’ll be hand-holding your camera while the train is moving, it’s typical that you’ll achieve the best stability at top speed.
You can lightly lean against the train window and hold your camera steady against the glass to add another dimension of stability. A wider stance will also prevent your body from swaying with the motions of the train.
Rapid Fire Shutter Release
Since the act of pressing the shutter release can actually shake your camera slightly, set your camera to rapid shutter to take numerous shots while holding down the shutter release button. This will also allow you to take many consecutive shots so you can choose the perfect one to edit in post-process.

If you enjoyed this article, feel free to check out our Aerial and Timelapse YouTube Channel!