
DIY - How to Make a Solar Lens Filter to Photograph a Solar Eclipse

Photo Taken by Mike Lindle - Using Self-Made Solar Filter
with Regions
There is a Total Solar Eclipse happening over South America on July 2, 2019! Make sure to attend if you’re able to!
It will be visible from select regions in Argentina and Chile. Some locations within Ecuador, Brazil, Uruguay, and Paraguay will experience a partial solar eclipse if there is not intense cloud coverage.
Solar Eclipse Series
- How to Make a Solar Lens Filter to Photograph a Solar Eclipse
- Photographing a Solar Eclipse and Best Camera Settings
- How to Create a Solar Eclipse Composite (Coming Soon)
Intro
Shooting the Great American Solar Eclipse in 2017 was nothing short of phenomenal. It was my first time shooting a Total Solar Eclipse and I almost didn’t make it out to Casper, Wyoming. In fact, my planning was so last minute that when I tried to order a Lee Solar Filter, or any solar filter for that matter, for my Nikon D750 and Nikkor 70-300mm f4.5-5.6 online everthing was sold out / backordered. My stomach churned, I felt defeated. How could I shoot the Total Solar Eclipse without the right filter. I almost didn’t make the journey to Wyoming and not going would have beena huge mistake. After numerous calls to local camera stores, unsuccessful frantic online shopping / browsing, and an ah-ha moment. I learned how to make my own solar filter for cheap, in 6 easy steps. The results also looked professional, I was very happy with the outcome. I have outlined my process below:
How to Make a Solar Filter
Step 1 - Purchase a Thousand Oaks Black Polymer Solar Filter Sheet 8”x8”. Thousand Oaks is the leading manufacturer of this black polymer solar material and has been in business for 30 years. It is commonly used in the inexpensive cardboard / plastic solar Eclipse Glasses that everyone wears to watch the sun. This polymer is safe for cameras / lenses / image sensors / telescopes / eyeballs.

You may not need the full 8” by 8” size, but for a few extra dollars it’s helpful to have extra material in case you mess up while making your filter. In the event that Amazon is sold out (it happened), you can find this material on eBay as well.
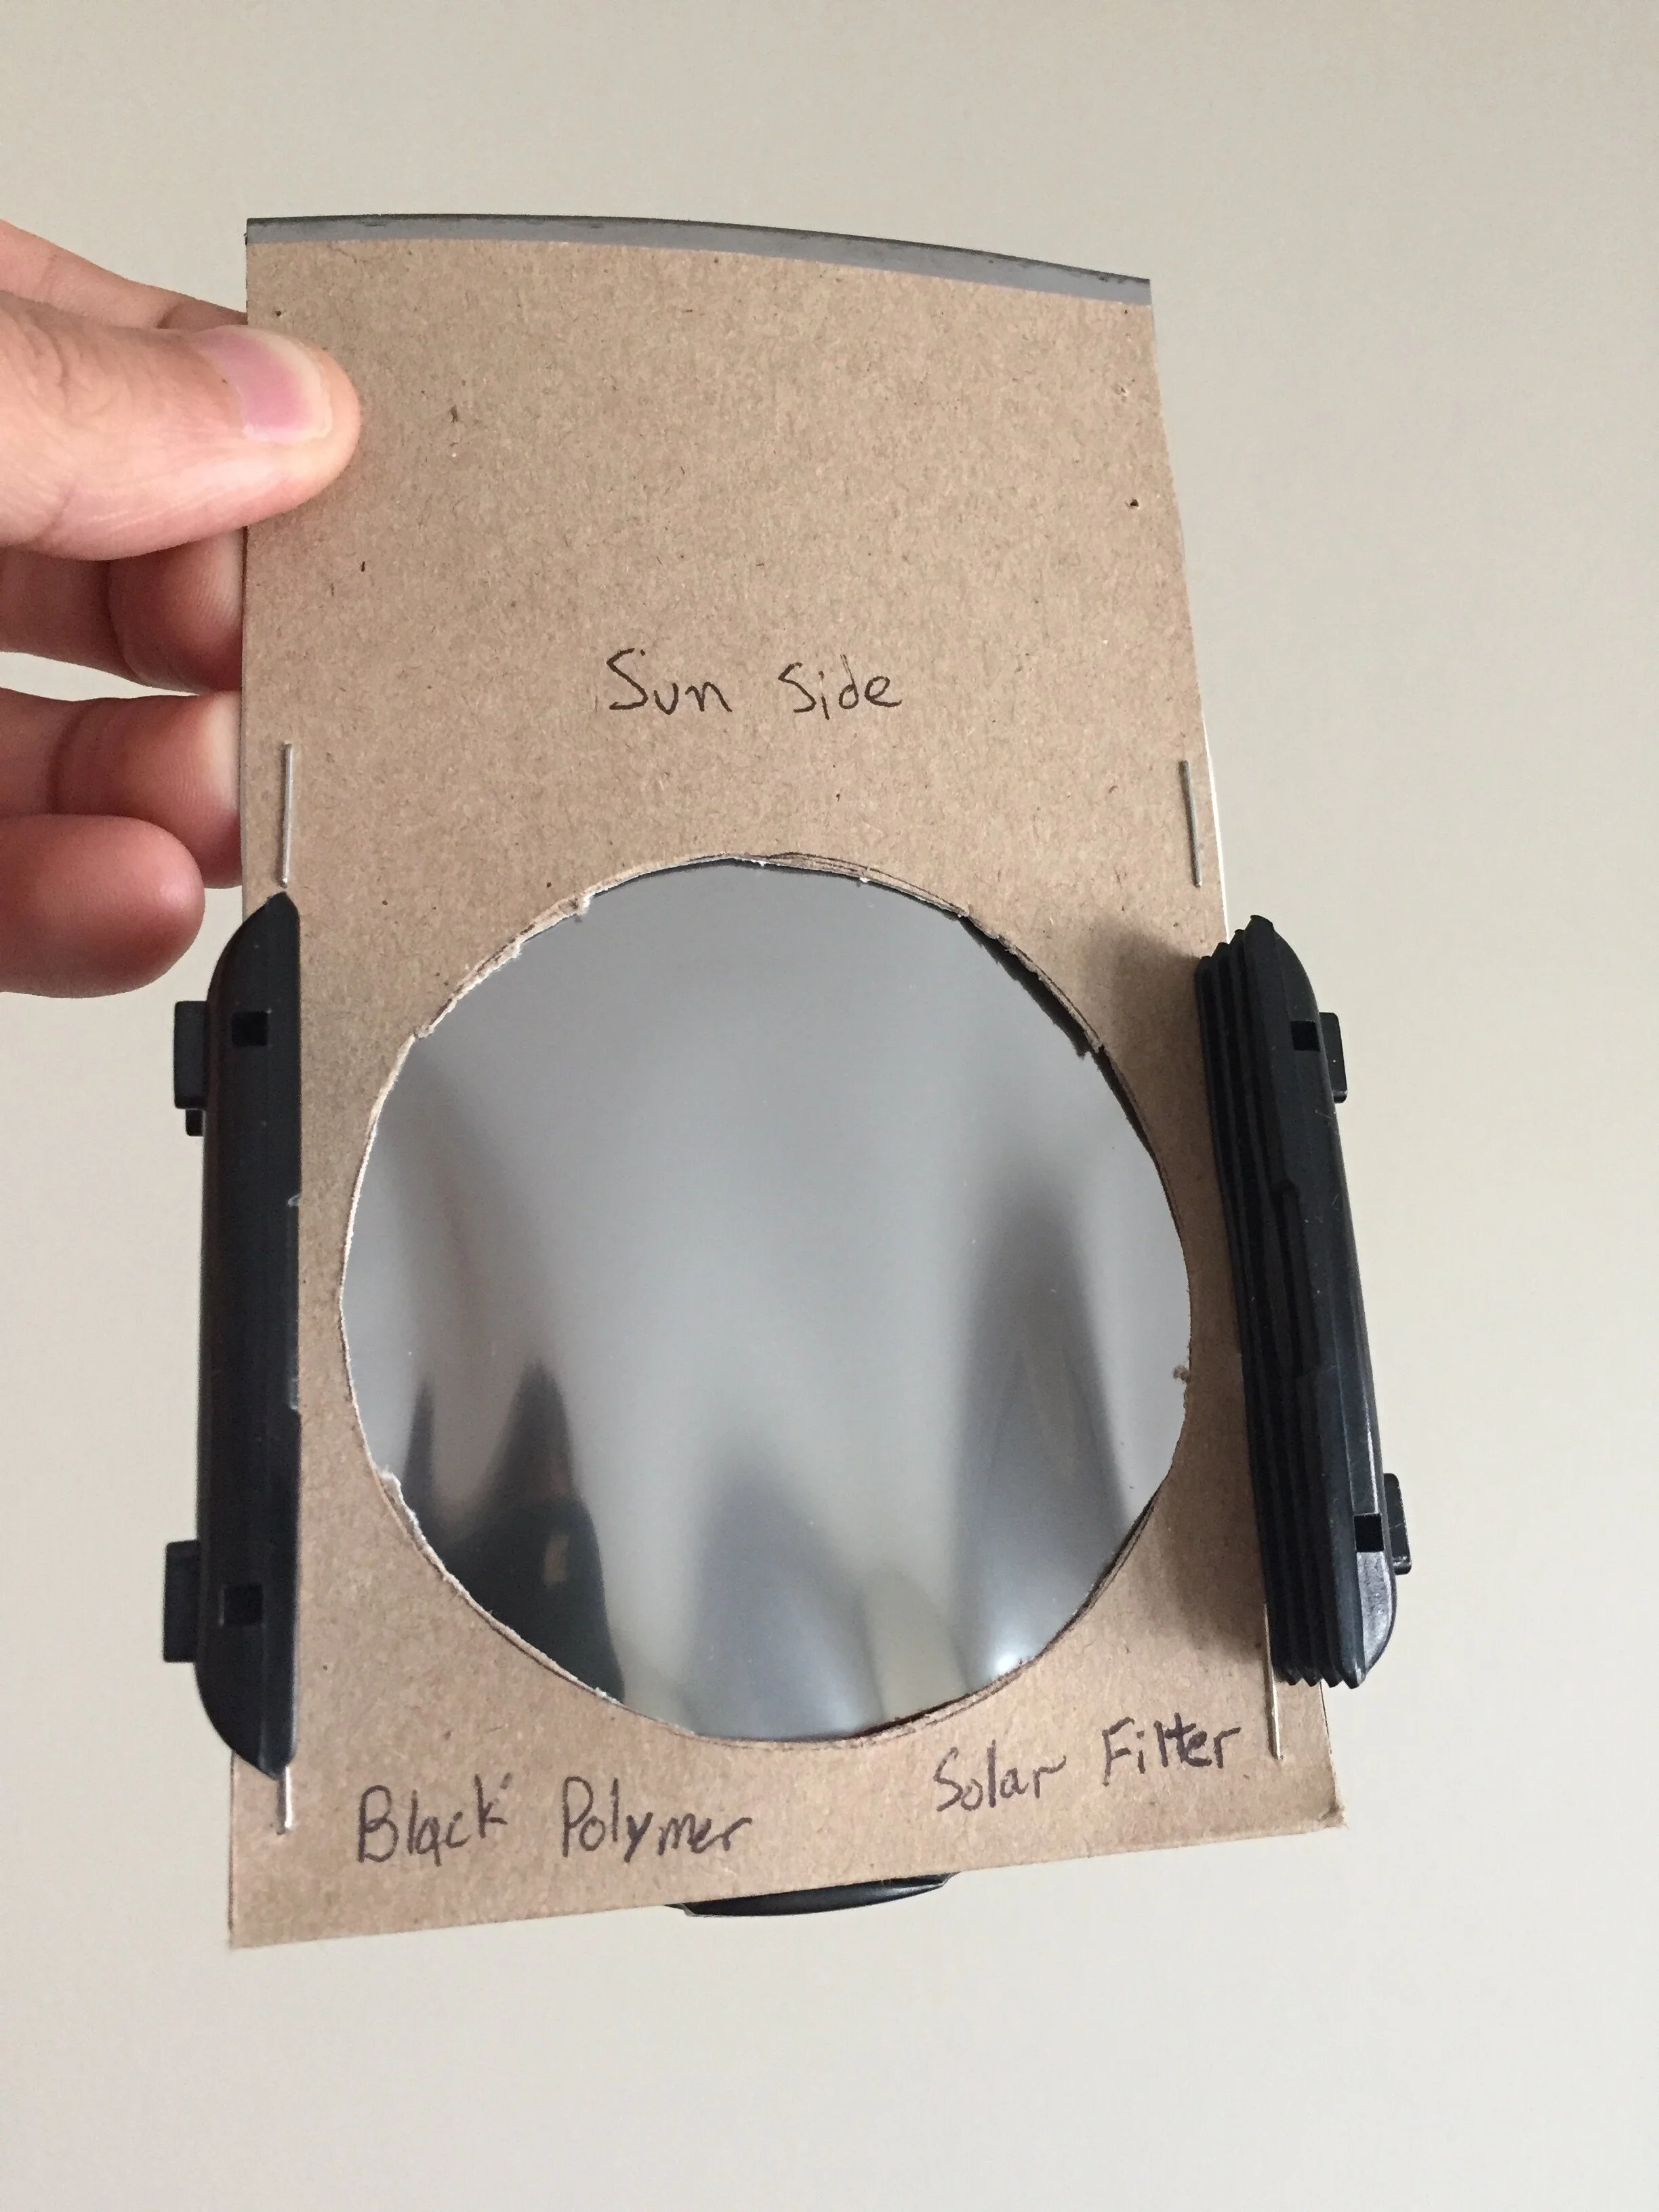
Some Thousand Oaks Solar Filter Sheets have two sides. A silver reflective side (which is meant to face the sun) and a black polymer side (which is meant to face the camera lens).


Step 2 - Purchase a square Graduated P Filter Holder with an adapter ring that fits your lens. (In my case, I used a 67mm adapter ring.) I purchased these products from my local camera store, but you can see what these products look like using the links above.

Step 3 - Find a piece of thin cardboard (I used a USPS Priority Mail shipping envelope which I got for free).
Cut to Fit into the grooves of the Graduated P Filter Holder. The width of the cardboard must fit the filter holder, in this case my width was 8.75 centimeters (approx 3.5 Inches). You will want 2 identical pieces so that the Black Solar Polymer can sandwich between the two pieces of cardboard. Confirm that the pieces slide into the grooves yet fit snug. Re-cut if needed to get it just right.

Step 4 - Once you confirm that your cardboard filter can fit in the ring, you’ll want to use a UV filter of your same lens thread size or equivalent filter (or your lens if you have no other choice) to trace the circular opening of the lens. You could choose to keep the filter square, it doesn’t matter as long as you plan to cover the entire front glass element of your lens. Once traced use a razor blade to cut out the opening to fit the Black Solar Polymer between each layer of cardboard.
Make sure to cut over another layer of cardboard to prevent scratching your table / work area.
Step 5 - Once the lens holes are cut out, I stapled the 3 layers together. Some people use tape, I found the staples added extra girth to the rig so the DIY filter fit more snug in the P Filter Holder and flush against the lens.


Step 6 - Insert your DIY filter into the Graduated P Filter Holder. If the fit is snug test out screwing it onto your lens to confirm that it’ll do the trick. Most importantly, you’re now ready to photograph the eclipse! Have fun and enjoy one of the most intense moments of your life!

Please Note: During a Total Solar Eclipse, you do not need to use a Solar Filter during Totality. This is the moment when the Sun’s Corona is visible. In this case, you can easily remove the filter and shoot Totality without the need for the Black Solar Polymer.
Check Out our other Solar Eclipse articles, linked above, to learn which settings to use when photographing a Solar Eclipse and how to create a Solar Eclipse Composite image.
If you enjoyed this article, feel free to check out our Aerial and Timelapse YouTube Channel!