
Guide to Buying Used Drones (Tested on DJI Mavic 2 Series)
Due to the manufacturing complexities, research & development, and cost of production for drones, flight controllers, motors, gimbals, obstacle avoidance sensors, high resolution 4K cameras, these tools can have a huge markup! Many opt to buy new, but when done carefully, buying used drones can be a wonderful way to save money while pursuing your dreams or hobbies as an aerial photographer / videographer and drone pilot.
**Please note that this guide was created for the Mavic 2 series, but these insights can be used and applied to other drones both inside and outside the DJI family of products.**
When Buying a Used Drone, Follow this Checklist
On the Ground
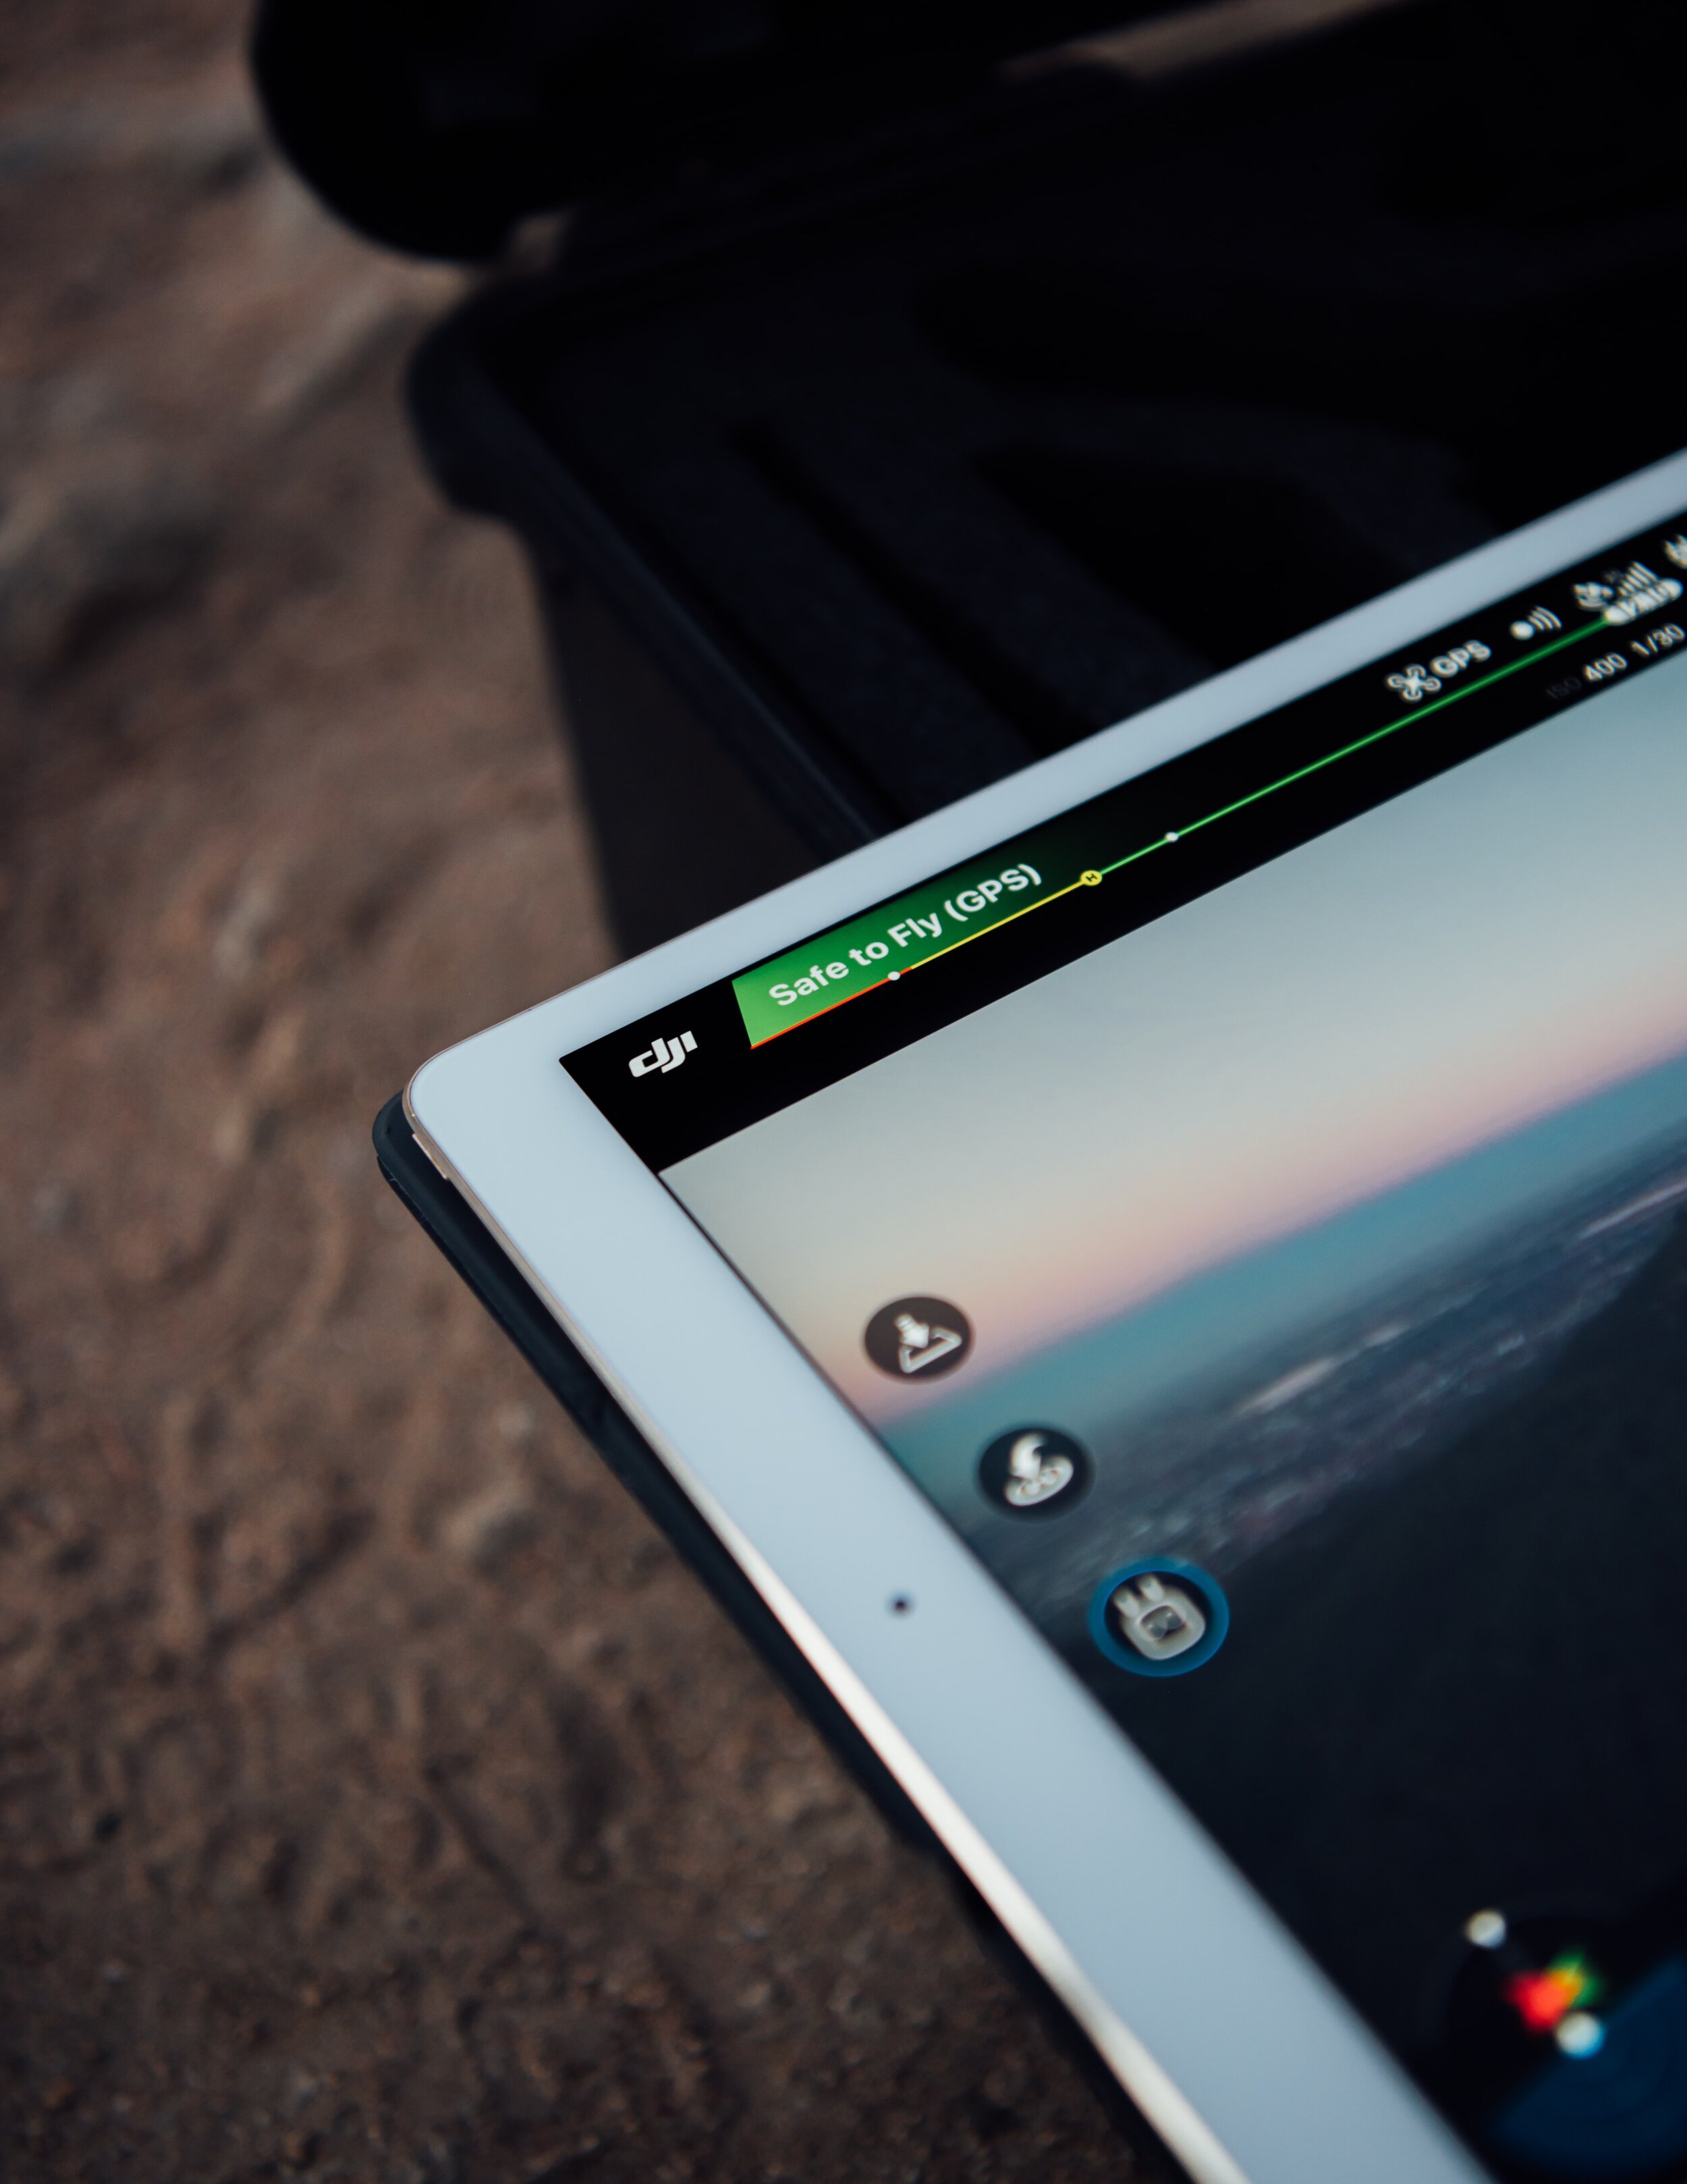
1 - Visual inspection
Inspect the drone, motors, body, propellers, and controller for physical scratches, dents, damage, scrapes, collision marks, or any other signs of serious wear and tear! Small cosmetic imperfections are expected when buying used but should not impact the functionality of the device. Inspect the lens of the onboard camera for any scratches or damage as well.
2 - Watch gimbal startup
Power the drone one. Upon startup, the camera’s gimbal should run through a startup sequence moving from one corner to the next. Expect a smooth automated motion from one side to the other. If the movement seems choppy or damaged, consider that the gimbal may be defective.

3 - Manual Gimbal Movement
Before taking off, while the drone is powered on, move the gimbal control wheel to ensure that the Gimbal is responsive and smooth. Pick up the drone and slowly move around to see if the gimbal tracks the movement.
4 - Test Photo + Video Settings
Before taking off, while the drone is powered on, change the aperture (if applicable), zoom lens (if applicable), shutter, ISO, white balance, and all other technical settings to ensure responsiveness. Take a test photo and test video. Access if in the playback display in the drone to check the quality of the recordings.

5 - Check Battery Charge Cycle
Buying used DJI Intelligent Flight batteries can be tricky. After prolonged use, these batteries are known to swell (puff up) and can potentially dislodge mid-flight which would cause a power failure and crash. When the drone is powered on, you can check the battery status in the flight controller menu and see how many charge cycles the battery has had. A healthy DJI Lithium Polymer (LiPo) battery has 4 cells that should hold approximately the same voltage charge (visualized by the green 4-box diagram).

4 LiPo cells with approximately the same voltage charge.
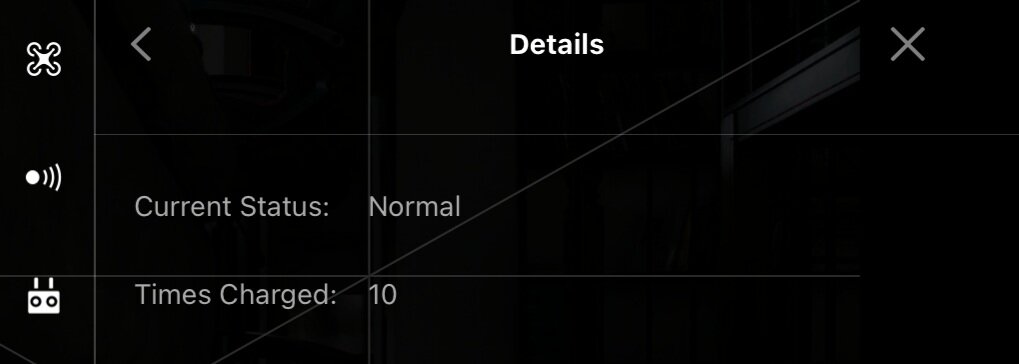
“Normal” Status with 10 Charge Cycles in “More Info” from Battery Menu
6 - Calibrate Joysticks
Using the remote controller, run the joysticks and wheels through the calibration setup screen to ensure the controller has not been damaged, the sticks are responsive and have the expected full range of motion. They should feel smooth without friction, grinding, and signs of damage.

7 - Check Overall Flight Status
At the top of the startup screen after entering the device, you can access the Flight Status display. Typically this screen will highlight any major problems with the unmanned aircraft. Scroll through this window and check for any error messages.

8 - Calibrate IMU
The Inertial Measurement Unit, or IMU, is the onboard chipset built into the drone that stabilizes the aircraft while in-flight. The IMU leverages data taken from the onboard accelerometer, gyroscope, thermometer, and barometer. The system reports the drone’s specific force, angular velocity, and attitude (which includes its course, pitch, and roll angles). Essentially this allows the drone to remain stable, upright, and level during flight operations. This is especially important while filming to ensure a level horizon and smooth flights. If you notice a crooked gimbal or strange flight patterns, calibrate the IMU to see if it improves performance!


9 - Calibrate Compass
If you are near metal objects, in a city, close to powerlines, satellites, etc, it is very likely you will need to calibrate the compass. Don’t let this error deter you, run the drone through the calibration prompt to ensure a successful calibration. It may take 2-3 times before the compass has been properly calibrated.

In the Air
1 - In-Flight Gimbal Movement
Take control of the gimbal while mid-flight to ensure that it moves and operates as expected. Remember that you can adjust the sensitivity and speed settings to achieve a more cinematic look while operating the UAV.
2 - In-Flight Gimbal Roll Adjustment
Fly high enough to have a clear shot of the horizon (within local legal heigh requirements). If the horizon is crooked, adjust the gimbal roll to completely level out the horizon. If this works as expected that gimbal is working properly. DJI is notorious for having crooked horizons and this should not deter you from purchasing the drone. As long as the roll settings can be corrected, it’s normal to do this a few times while flying to ensure a perfectly straight horizon. (or you can adjust, rotate, crop in post-processing).

3 - Check Gimbal Stability In-Flight
Monitor the stability of the gimbal while the drone is flying in the air. Make a few turns, rotations, try filming a quick shot to ensure your gimbal is acting as expected. By design, the gimbal is supposed to smooth out the motion and eliminate shakiness. If the gimbal is not working properly, it would be very noticeable in the video feed while flying.
4 - Observe Video Channel Quality
Distance test the drone and monitor your vision feed for a stable connection. If the two antennae on the remote controller appear damaged, this may affect the visual quality which displays on your smartphone. In open areas, you can fly your drone at great distances without losing the signal. Stress test it by flying to a distance you feel comfortable. Note if there’s magnetic interference or obstacles you may have increased signal interruption which would not result from damage or misuse.

5 - Test “Return to Home” Feature
Testing the Return to Home (RTH) feature is very important before purchasing a used drone. The worst-case scenario is this feature fails to work and you experience a flyaway. Flyaways happen when the satellite / GPS connection logs the drone’s Return to Home point in the wrong location. When the battery runs down to a forced Return to Home, instead of returning to you, the drone would return to the random point and fly away, the battery would run out, and you’d never see it again.
Before taking off, check to see if the automatic Return to Home point is logged on the map in the same location you are. Once confirmed, take off with the drone, fly it 200 feet or more away and 100 feet in the air. Hover in place for a few minutes, then activate the Return to Home feature and wait for the drone to come back and auto land near your take-off point.
Do not purchase the drone if the Return to Home feature does not function properly, this is your life-line to safely landing the drone.
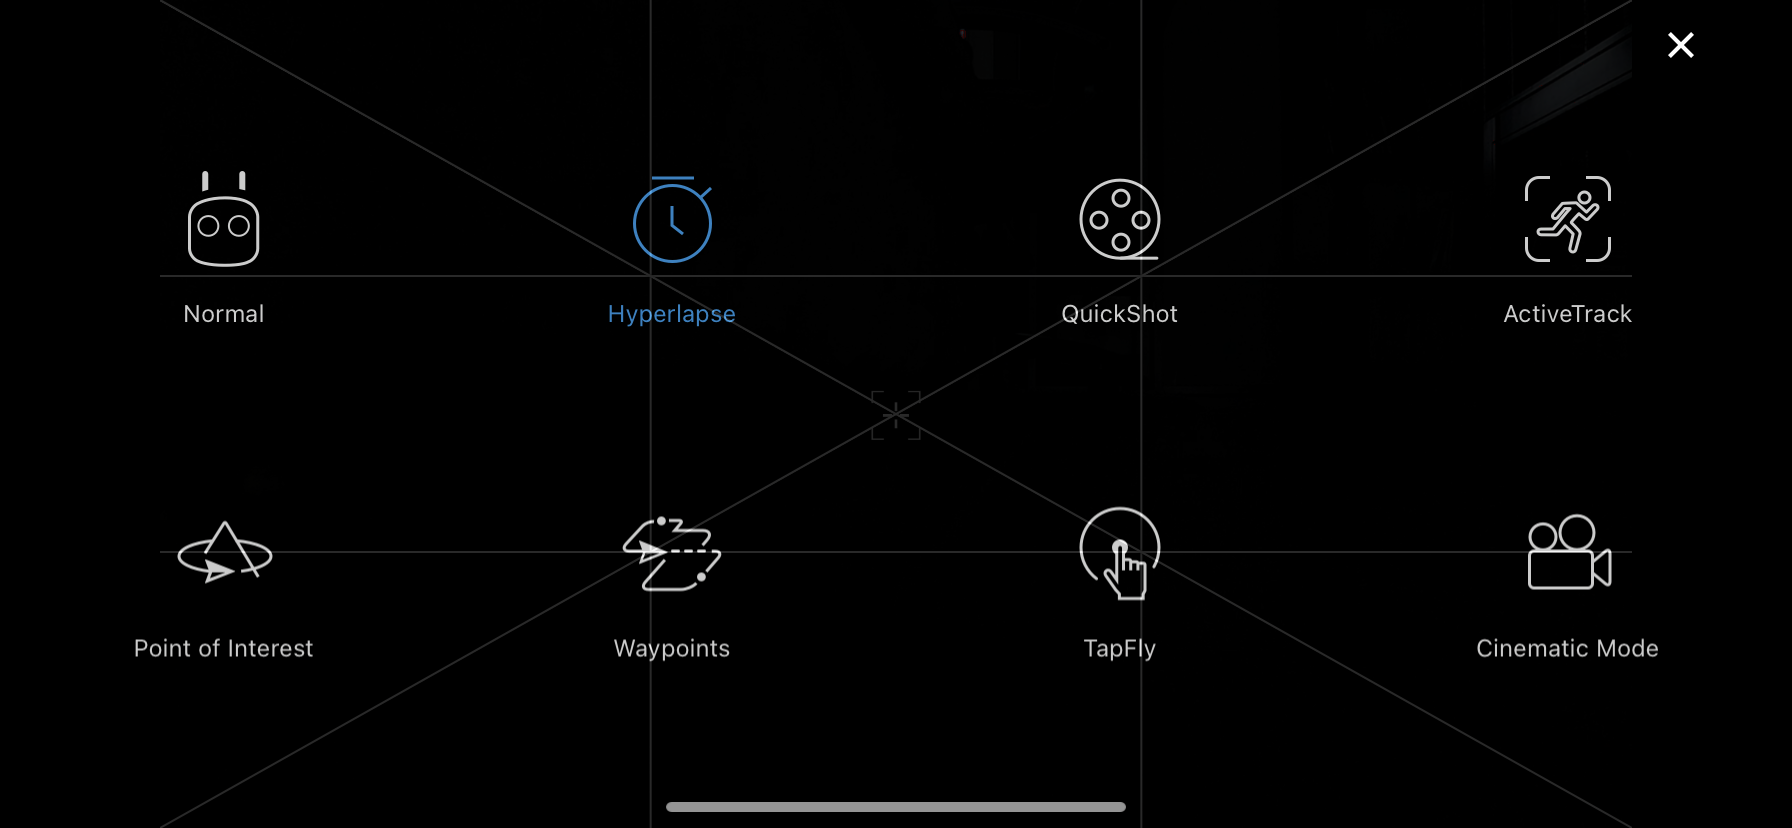
7 - Test Hyperlapse Feature + Smart Controller Features
Enter the smart controller menu in your controller and test out a few of the features. Set a few waypoints in the hyperlapse function and run the drone through the sequence to ensure it stays on course and shoots on the right interval. Check the memory card to see how the photos/videos are saved.
8 - Toggle Between Positioning, Sport, and Tripod Mode
Test Sport and Tripod Mode by toggling the switch on the right side of the controller. Tripod mode is very slow motion to ensure detailed sweeping cinematic shots while Sport mode pushes the limits of the motors to give you more speed. Make sure these modes work properly!

Final Words on Used Drone Equipment
There are so many features, dimensions, and technical details to check before investing in used drone equipment. While both these lists may not include everything, it's definitely a great place to start. If possible, buy used equipment from someone credible. Buy used gear from photographers/videographers who are easy to do a background check on. Bring a friend with you if you're meeting a stranger in person. (Bonus if they're savvy with drones!) Most importantly, stay safe, don't get ripped off, and have fun exploring!
Share this guide with your friends or anyone you think may find this useful.

If you enjoyed this article, feel free to check out our Aerial and Timelapse YouTube Channel!